EinoDev visual orchestration plugin guide
Introduction
💡 The Eino visual orchestration plugin provided by Goland allows for the orchestration of Graphs through component drag-and-drop in GoLand, and supports import and export functionalities.
Initial Plugin Overview
Plugin Features Introduction
Introduction to Orchestration Components
Graph
- Consistent with the concept of Graph in Eino, it refers to the Graph ultimately generated by the plugin side. You can add a Graph on the following interface.
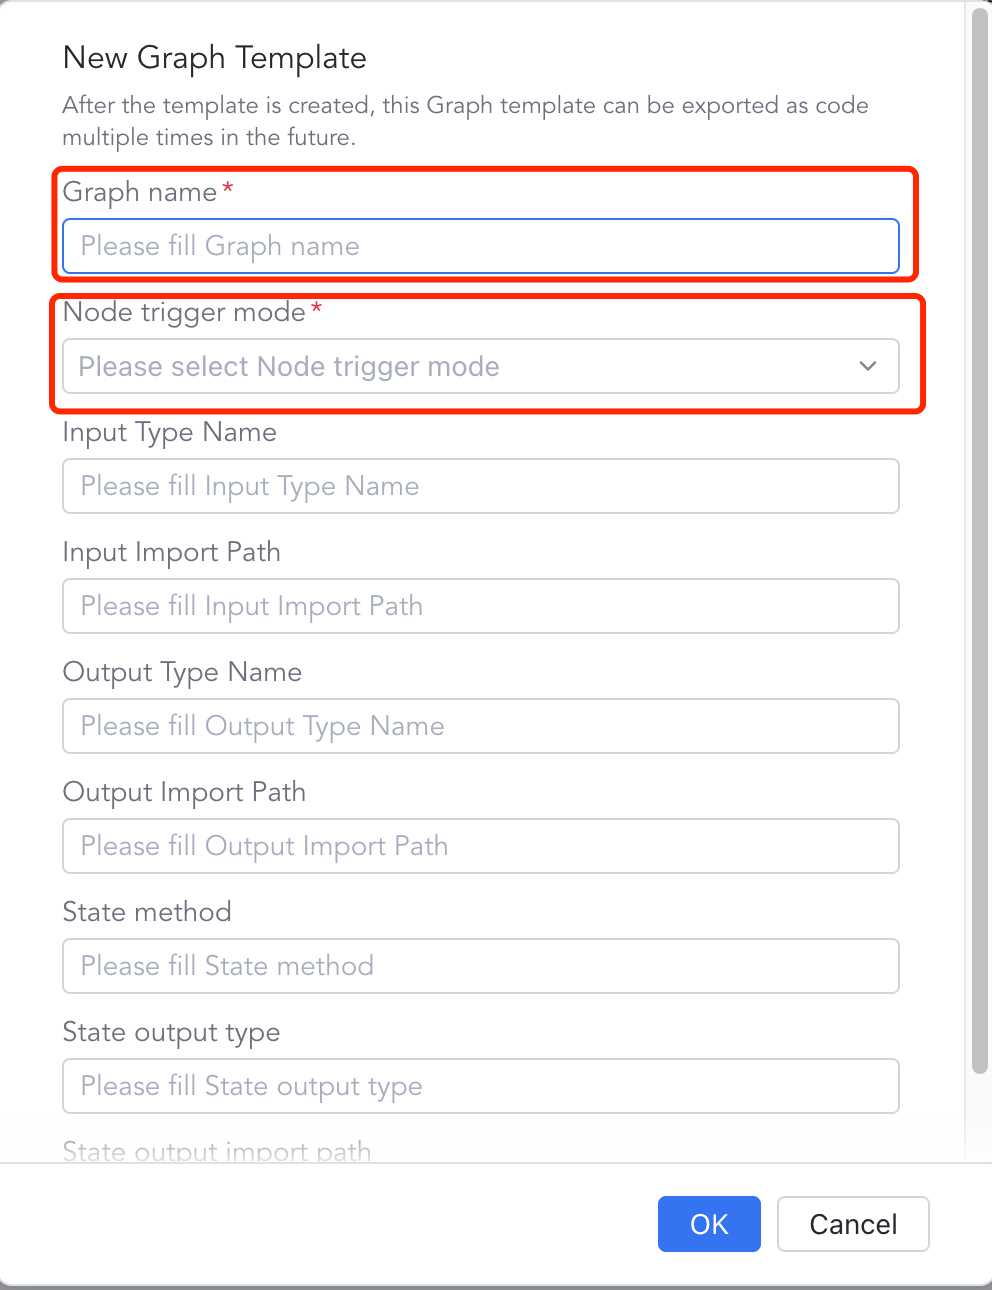
- Click on Add Plugin, and a creation dialog box will pop up. Fill in the configuration information according to the field instructions to generate a Graph orchestration object.
Node
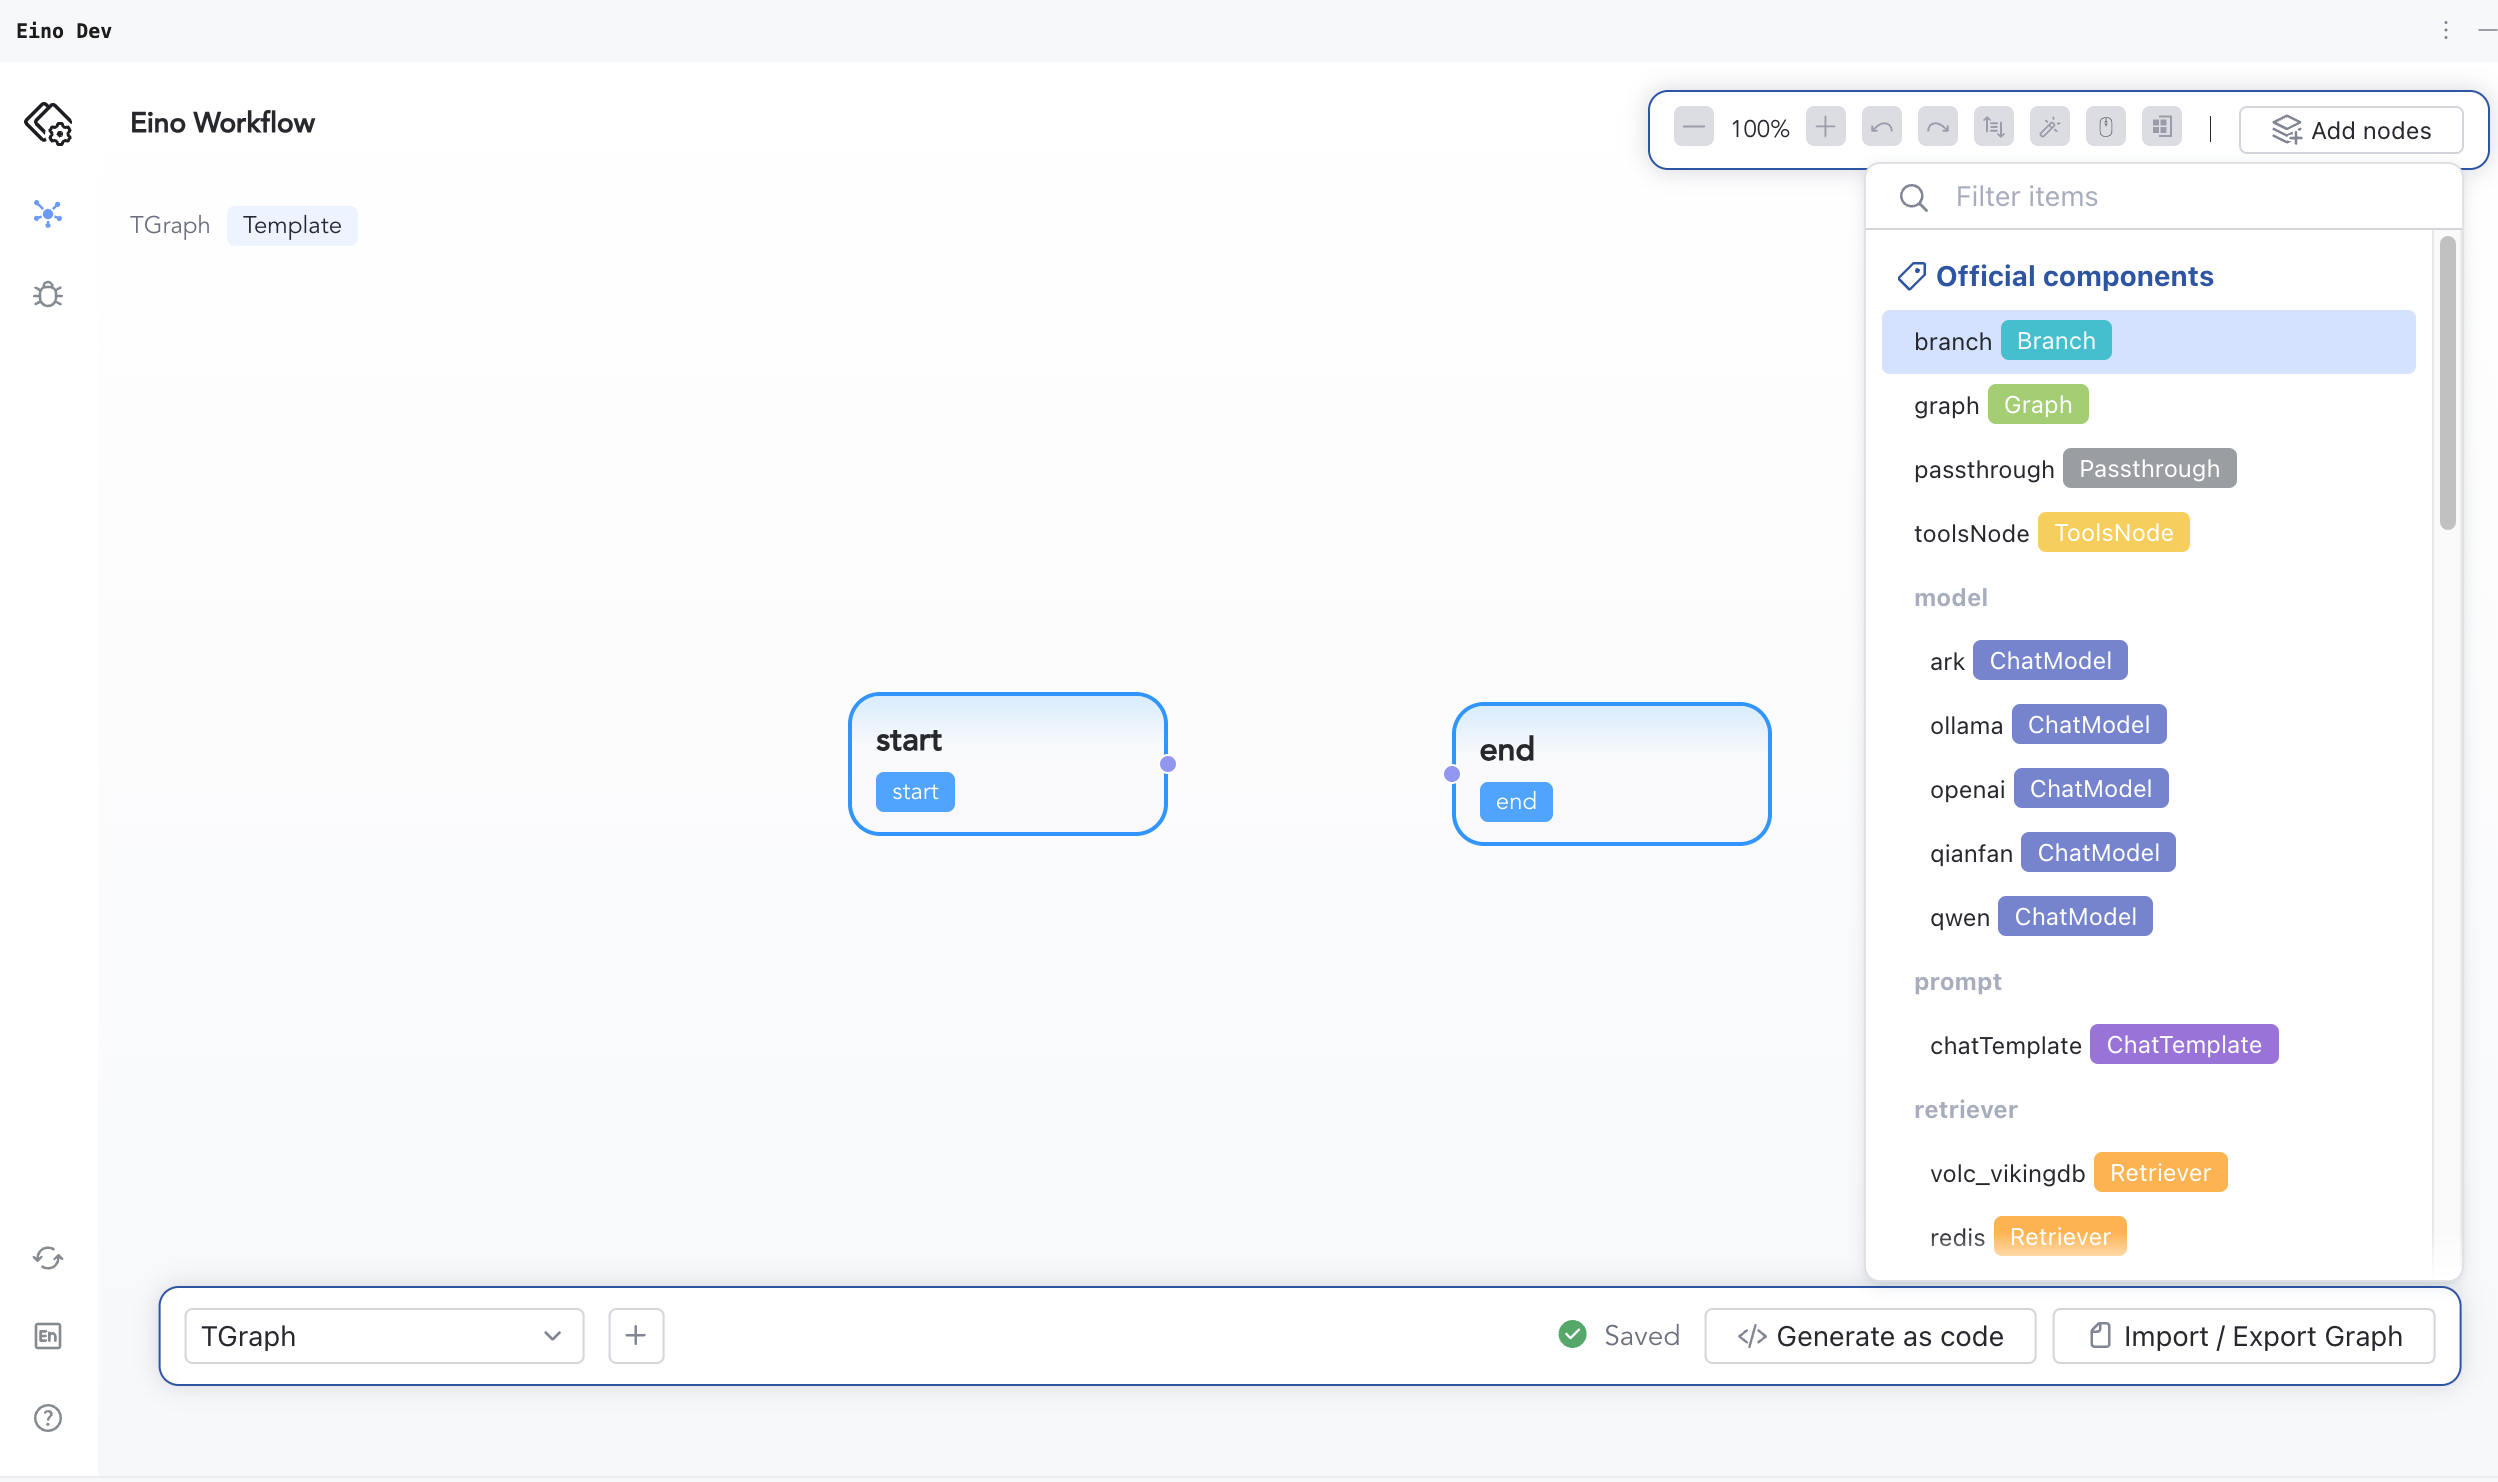
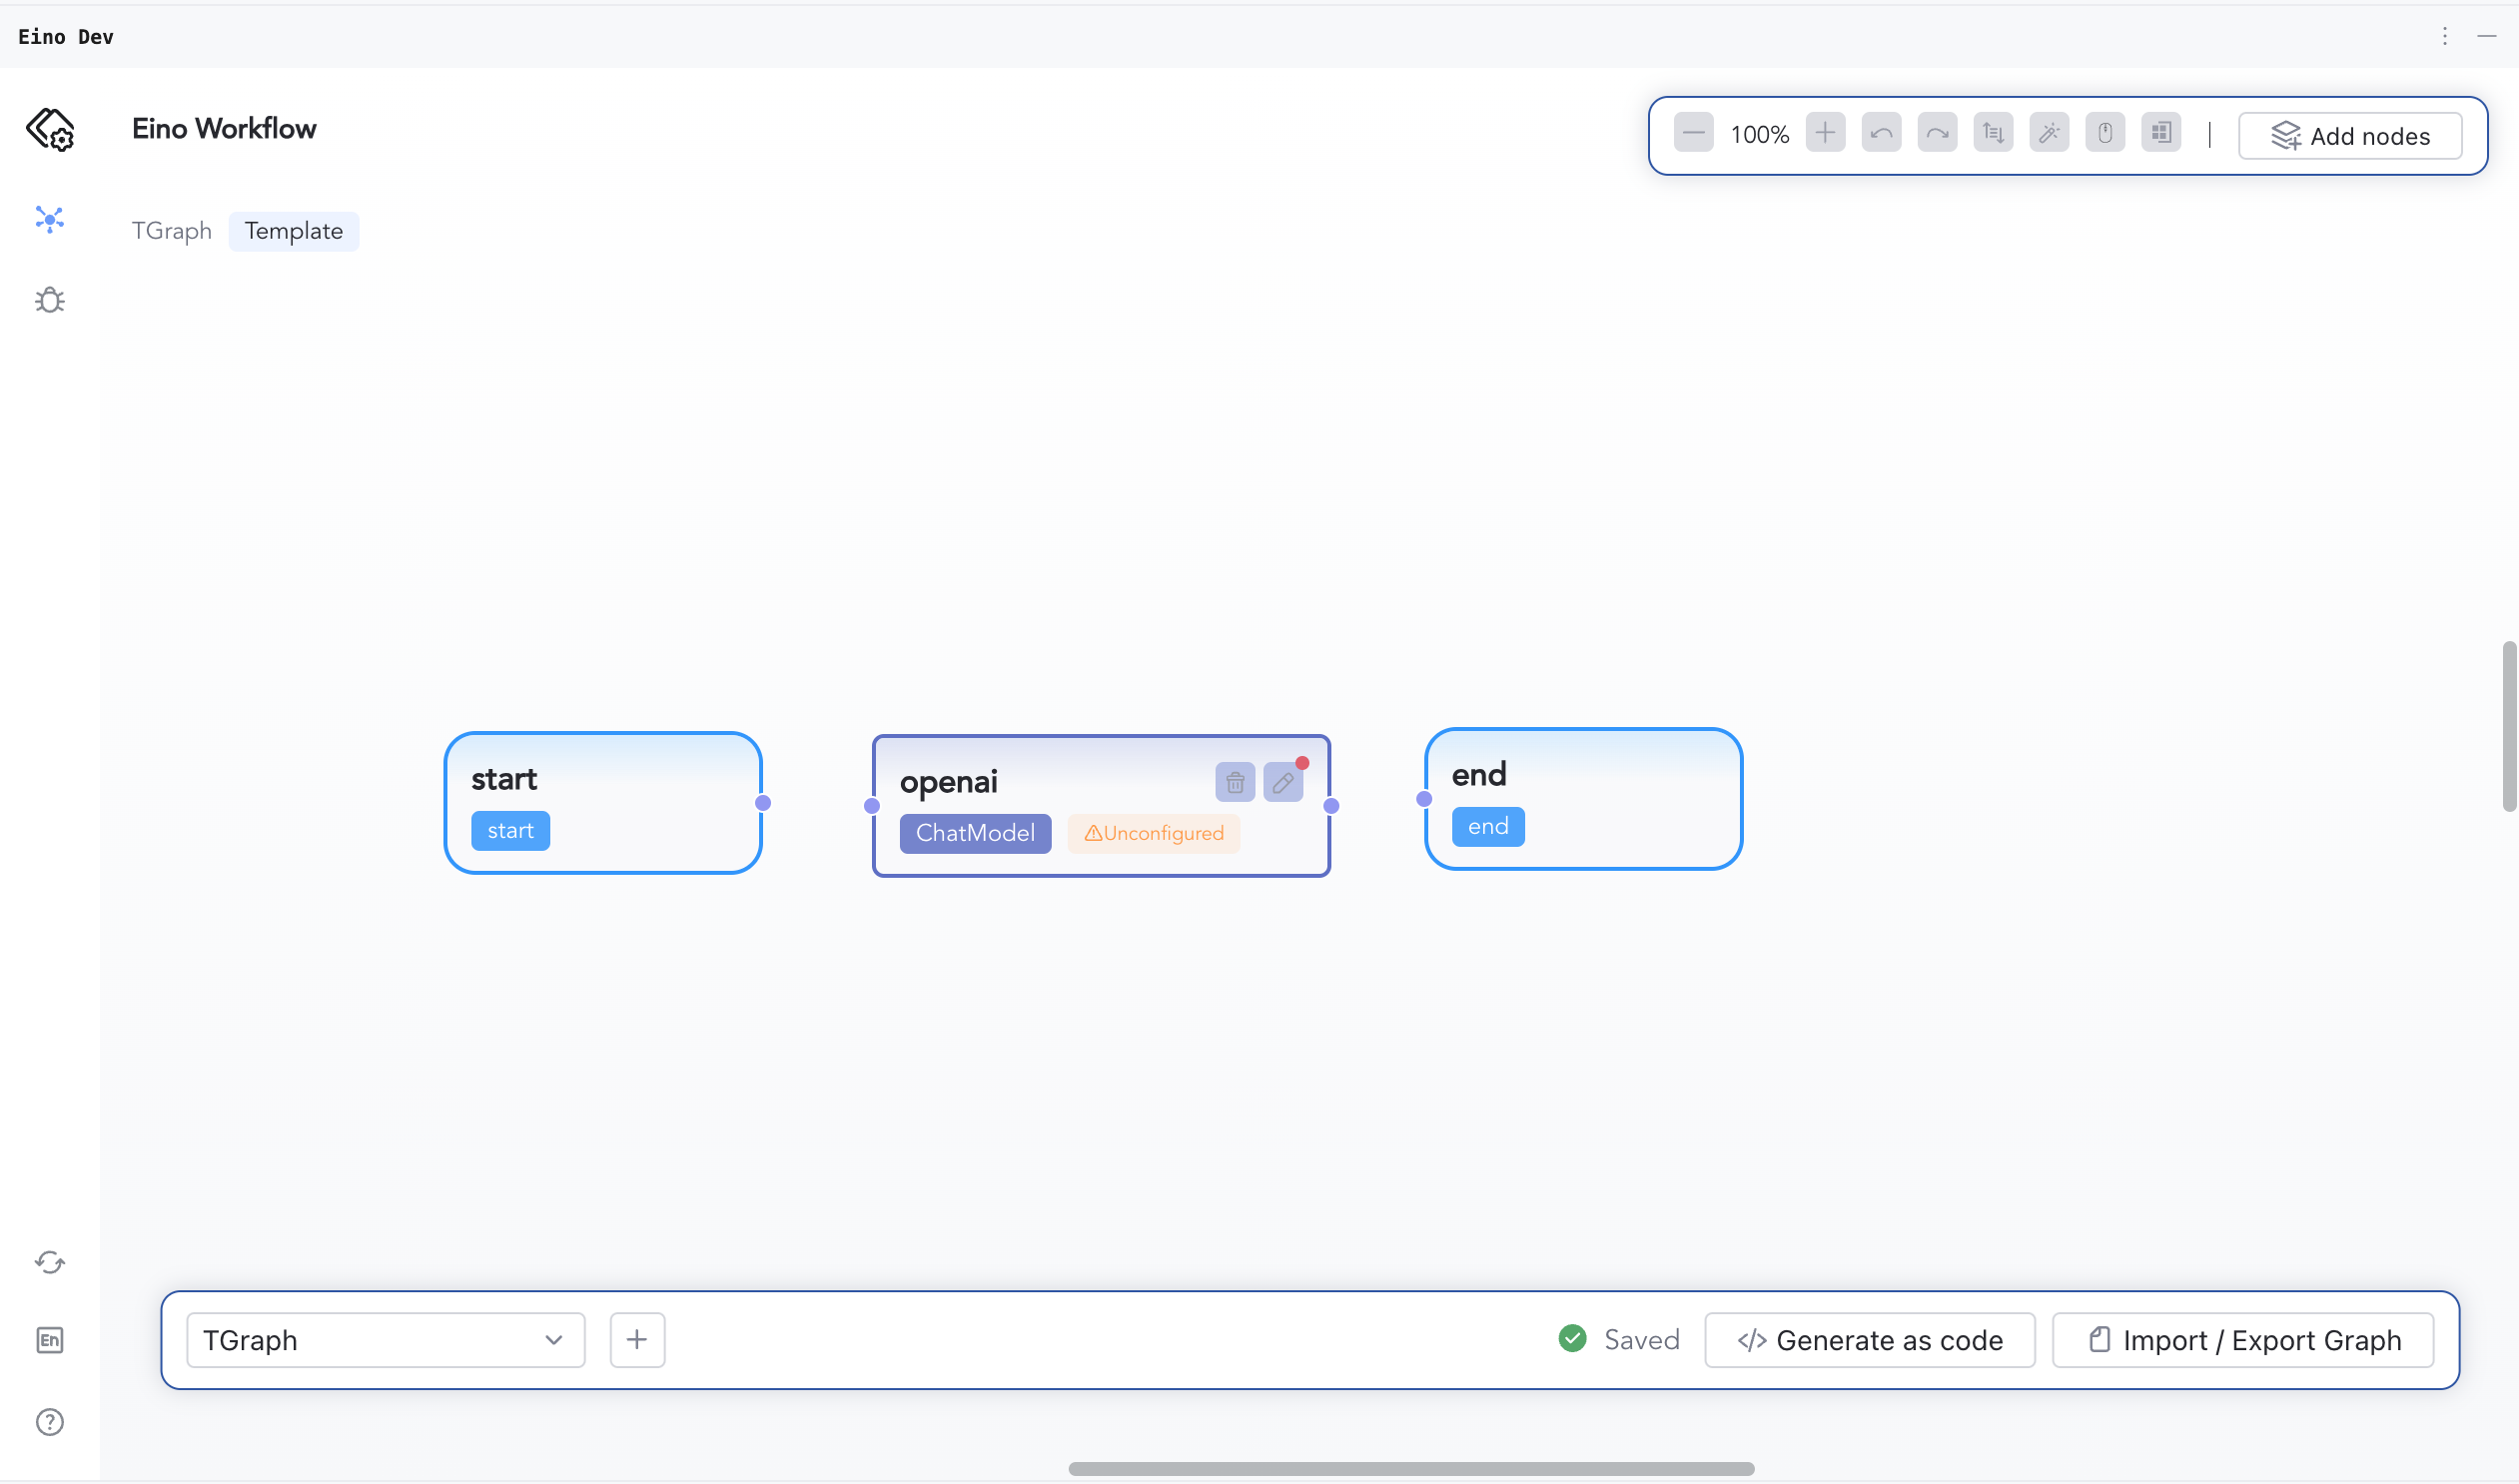
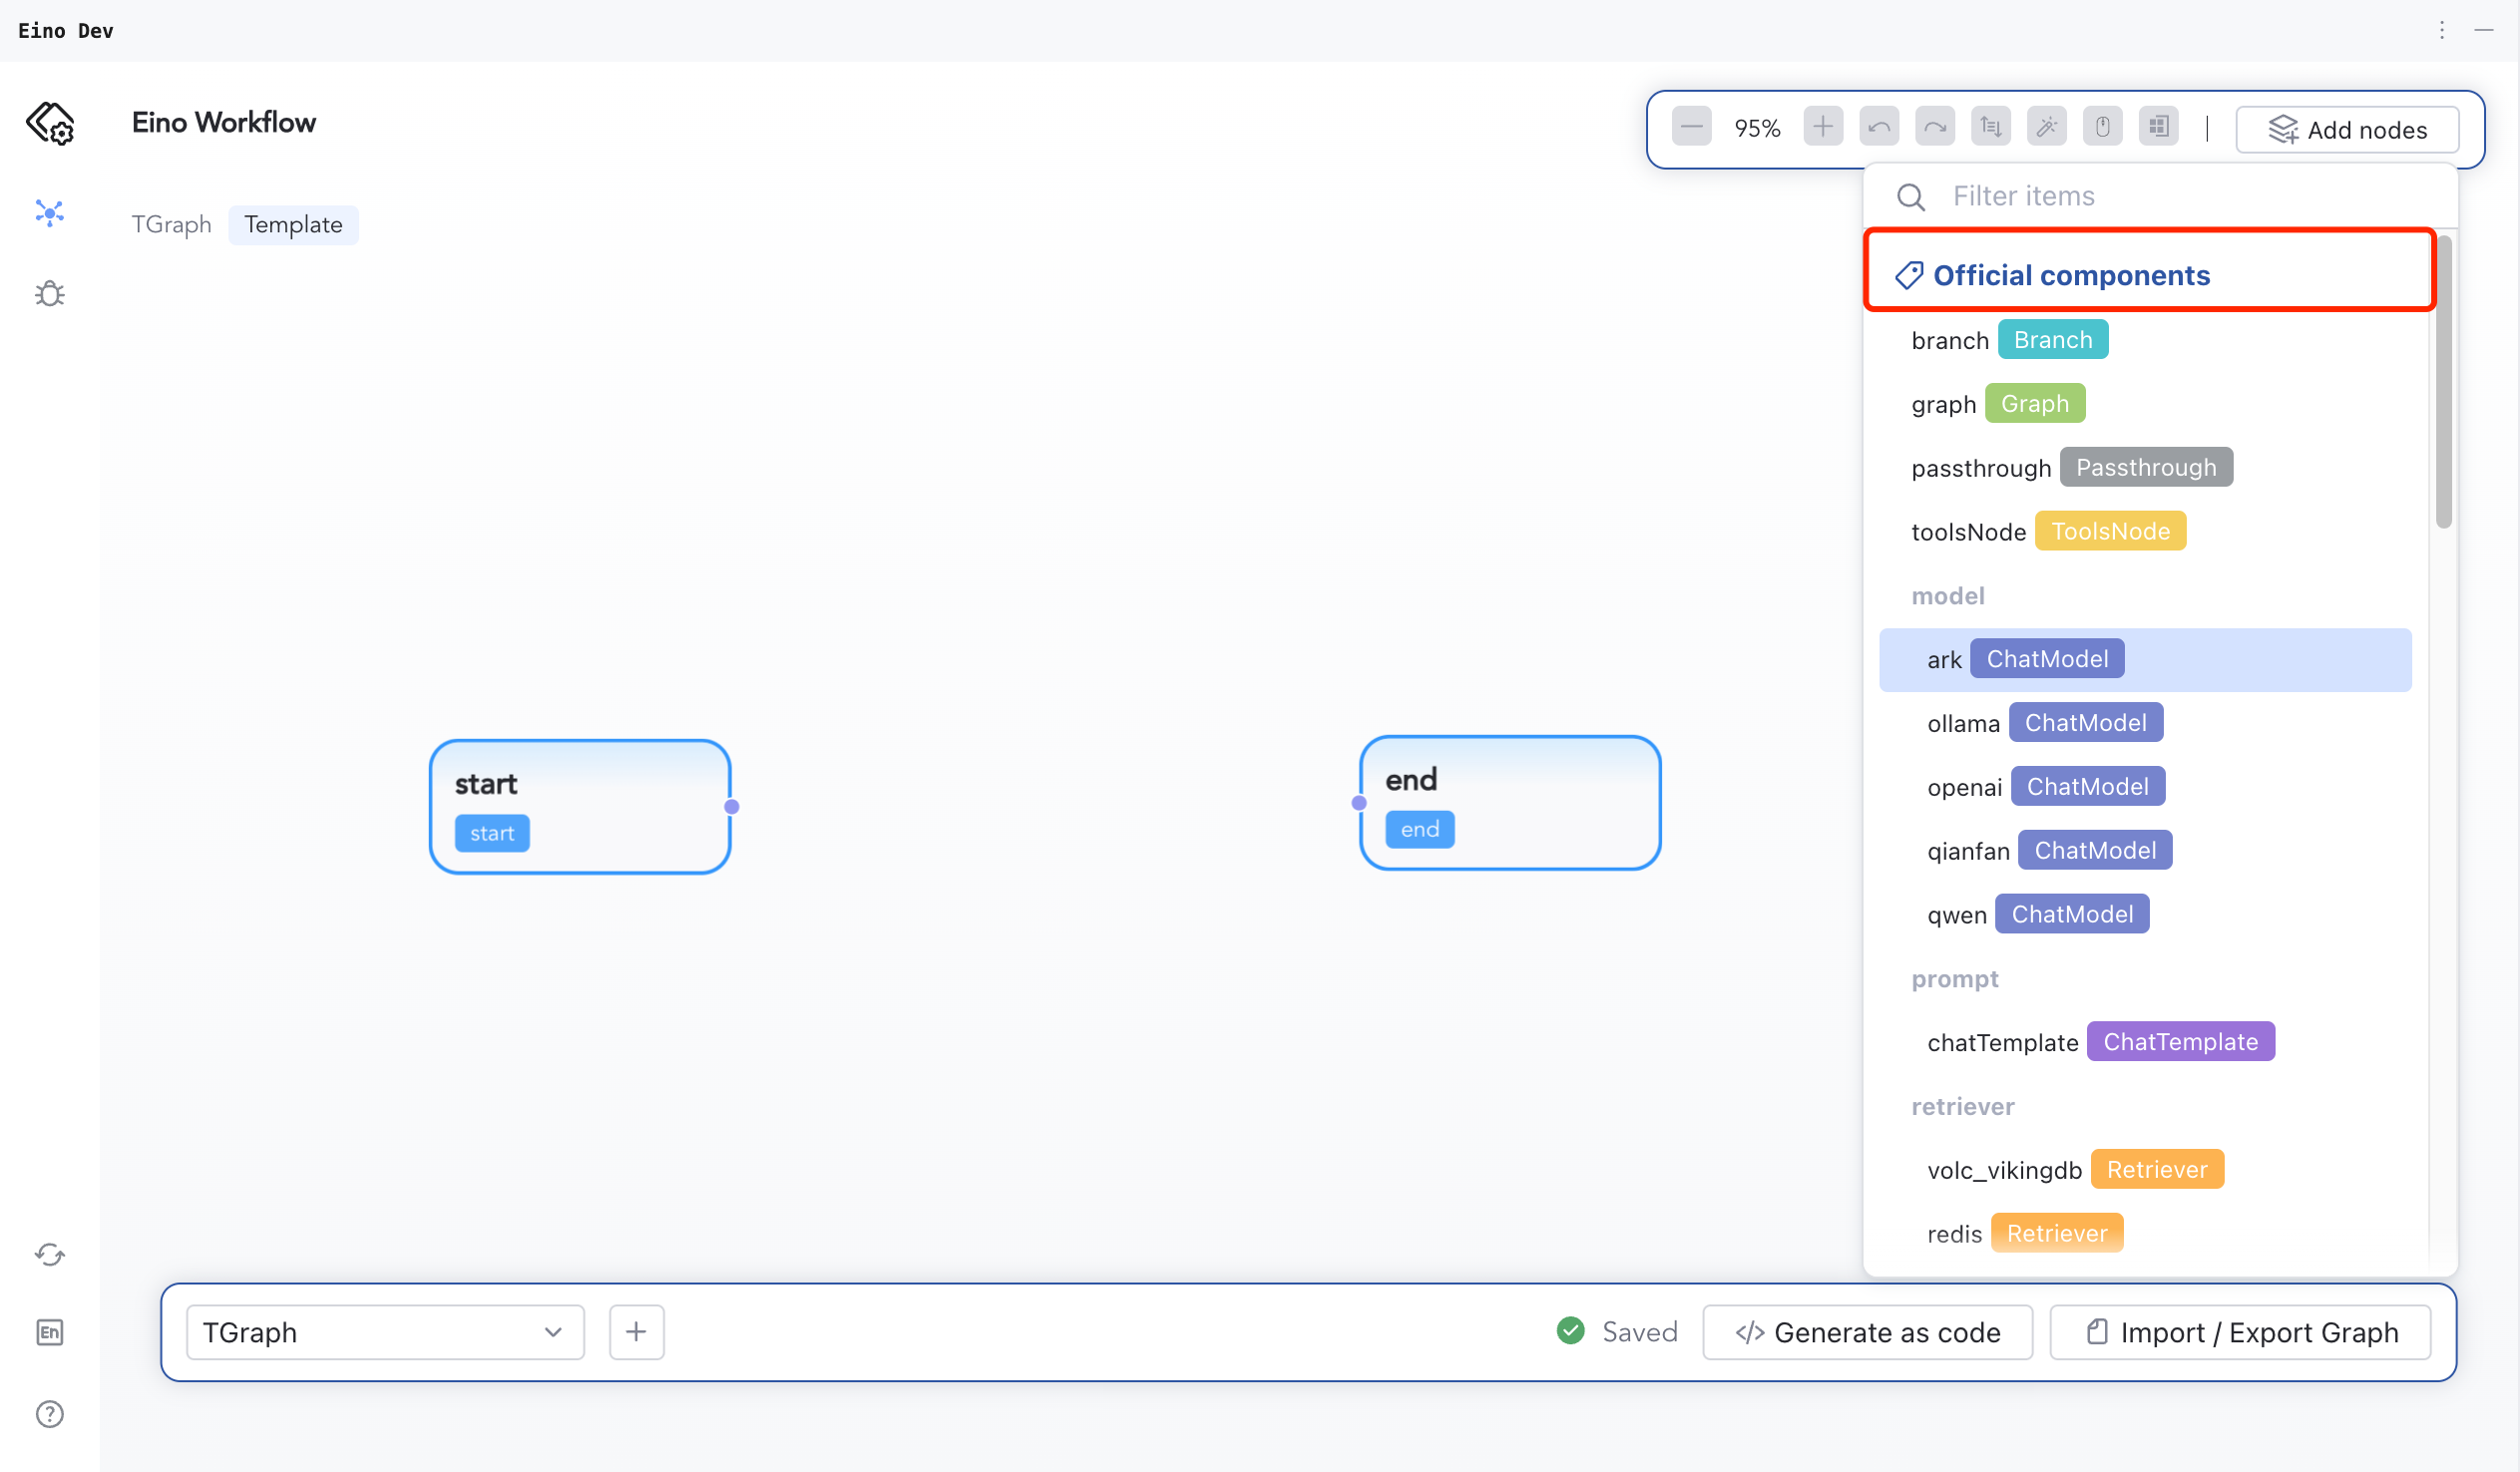
- Consistent with Node in Eino, after creating the Graph, different types of Nodes can be added to the canvas through the Add Nodes option at the top right corner of the interface.
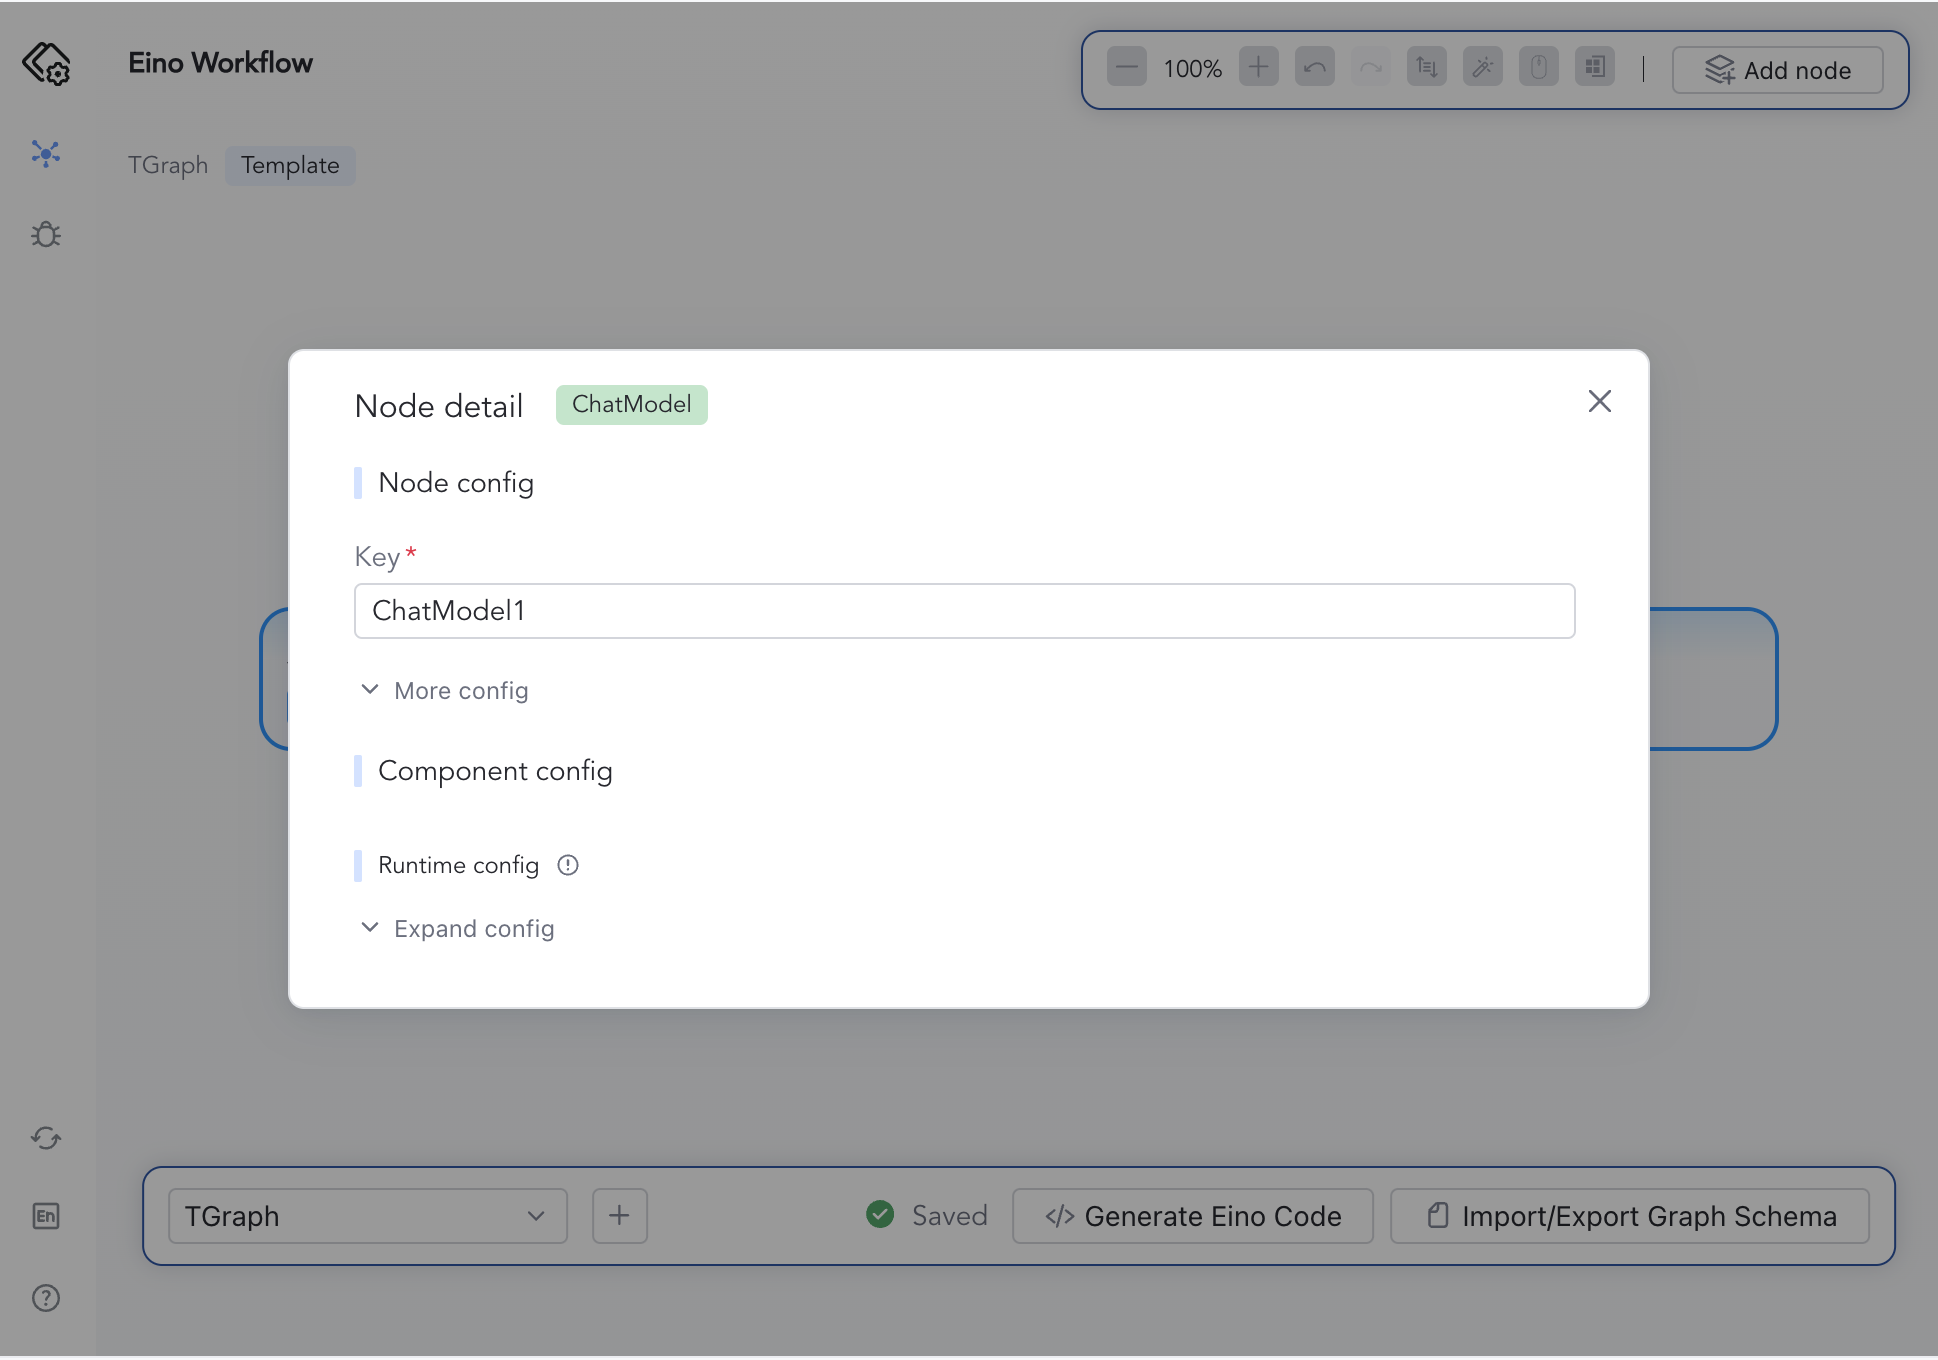
- Nodes added to the Graph will automatically fill the NodeKey by default. Additionally, you can expand More Config to configure optional settings for the Nodes.
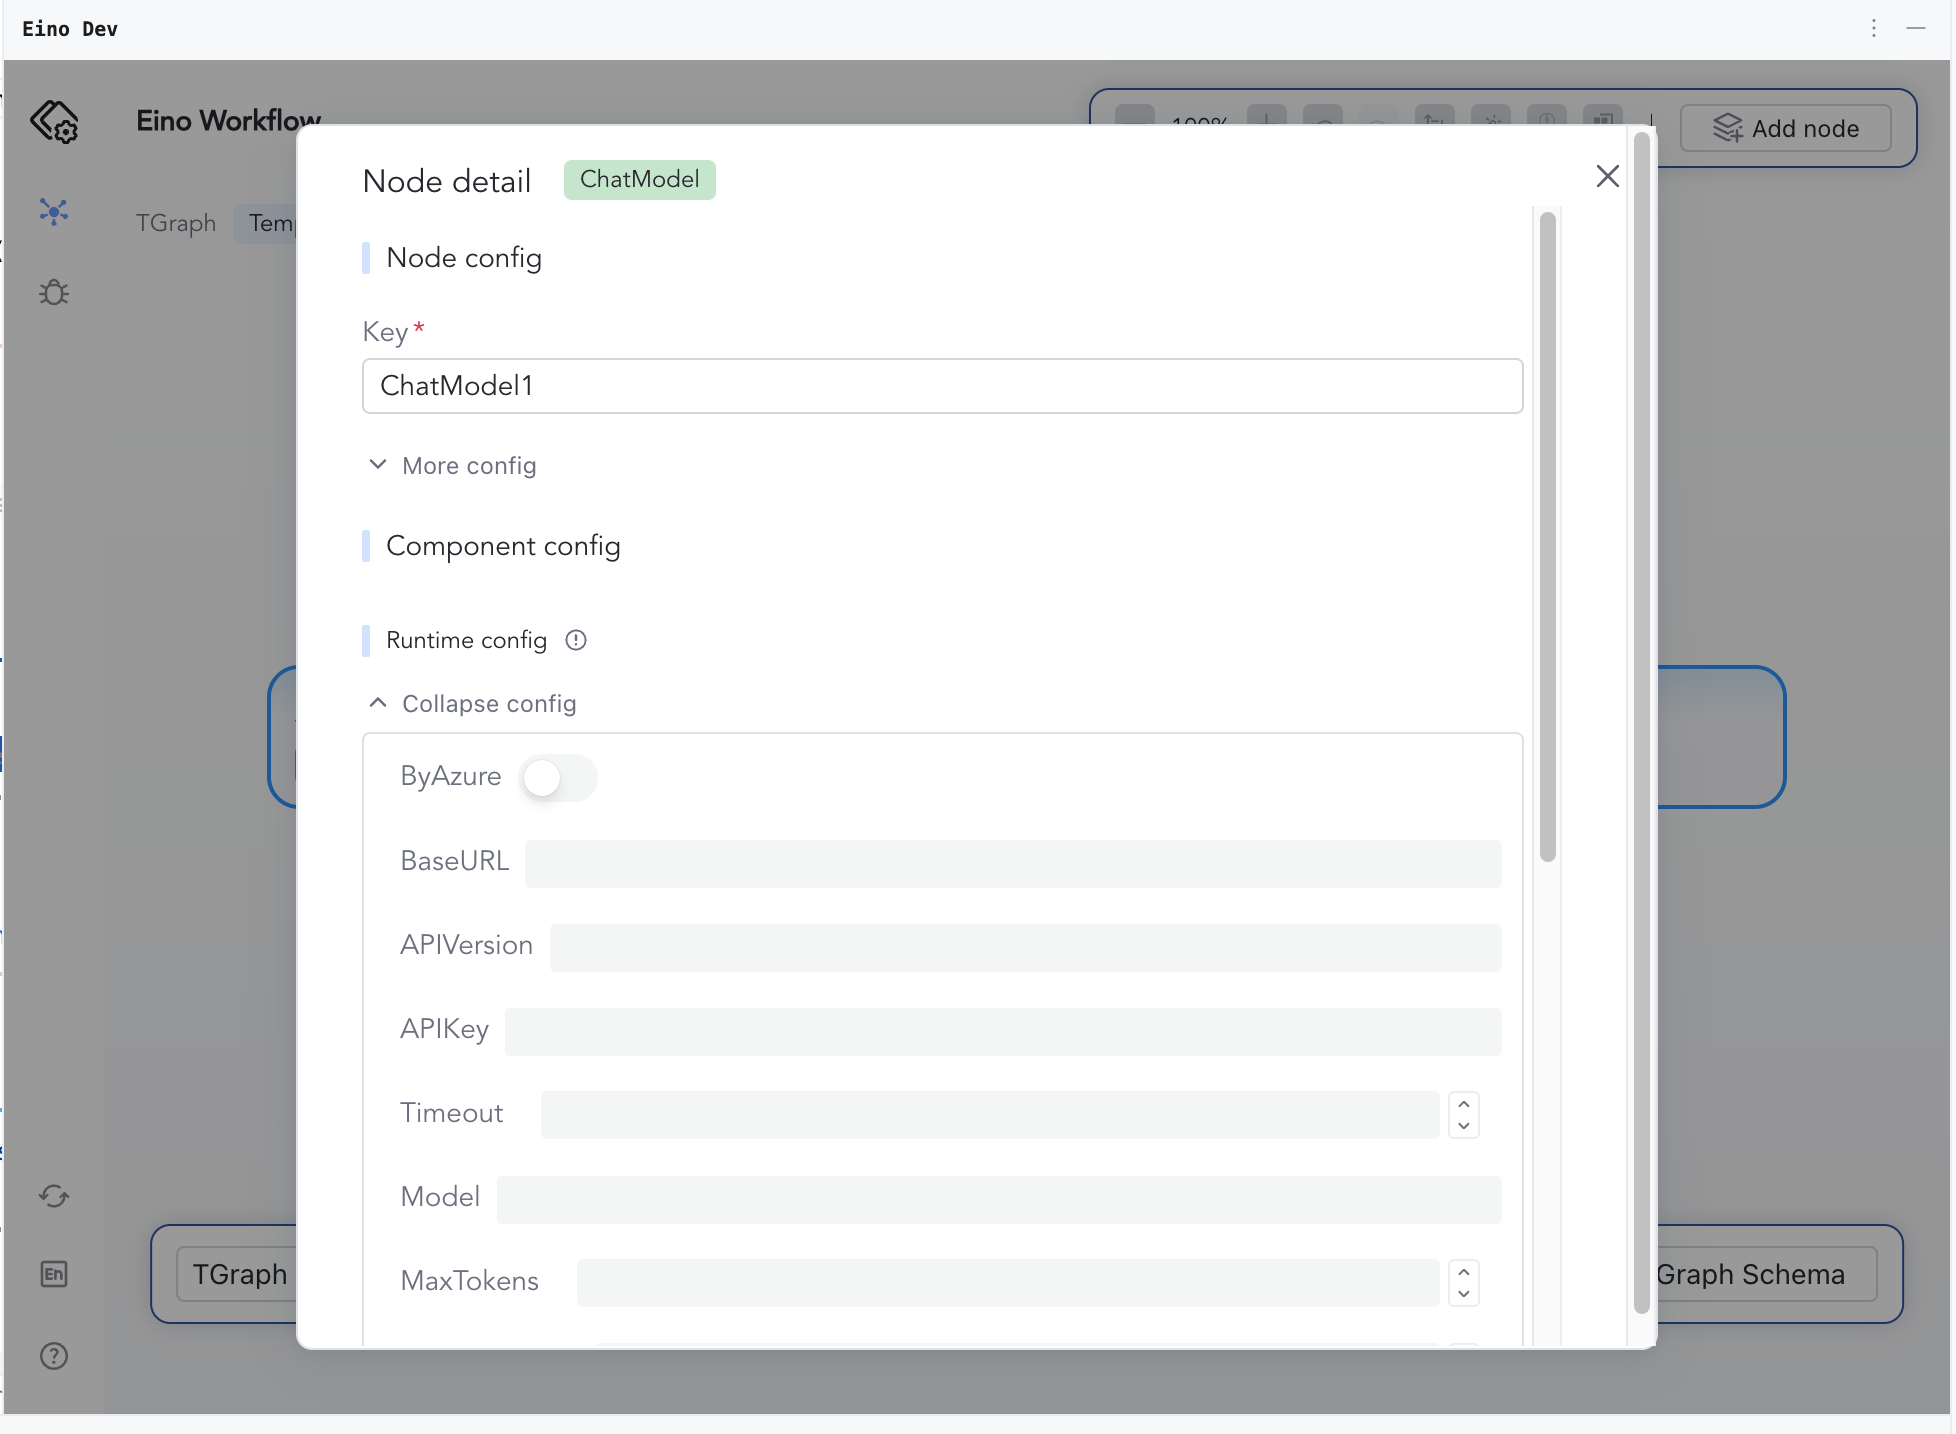
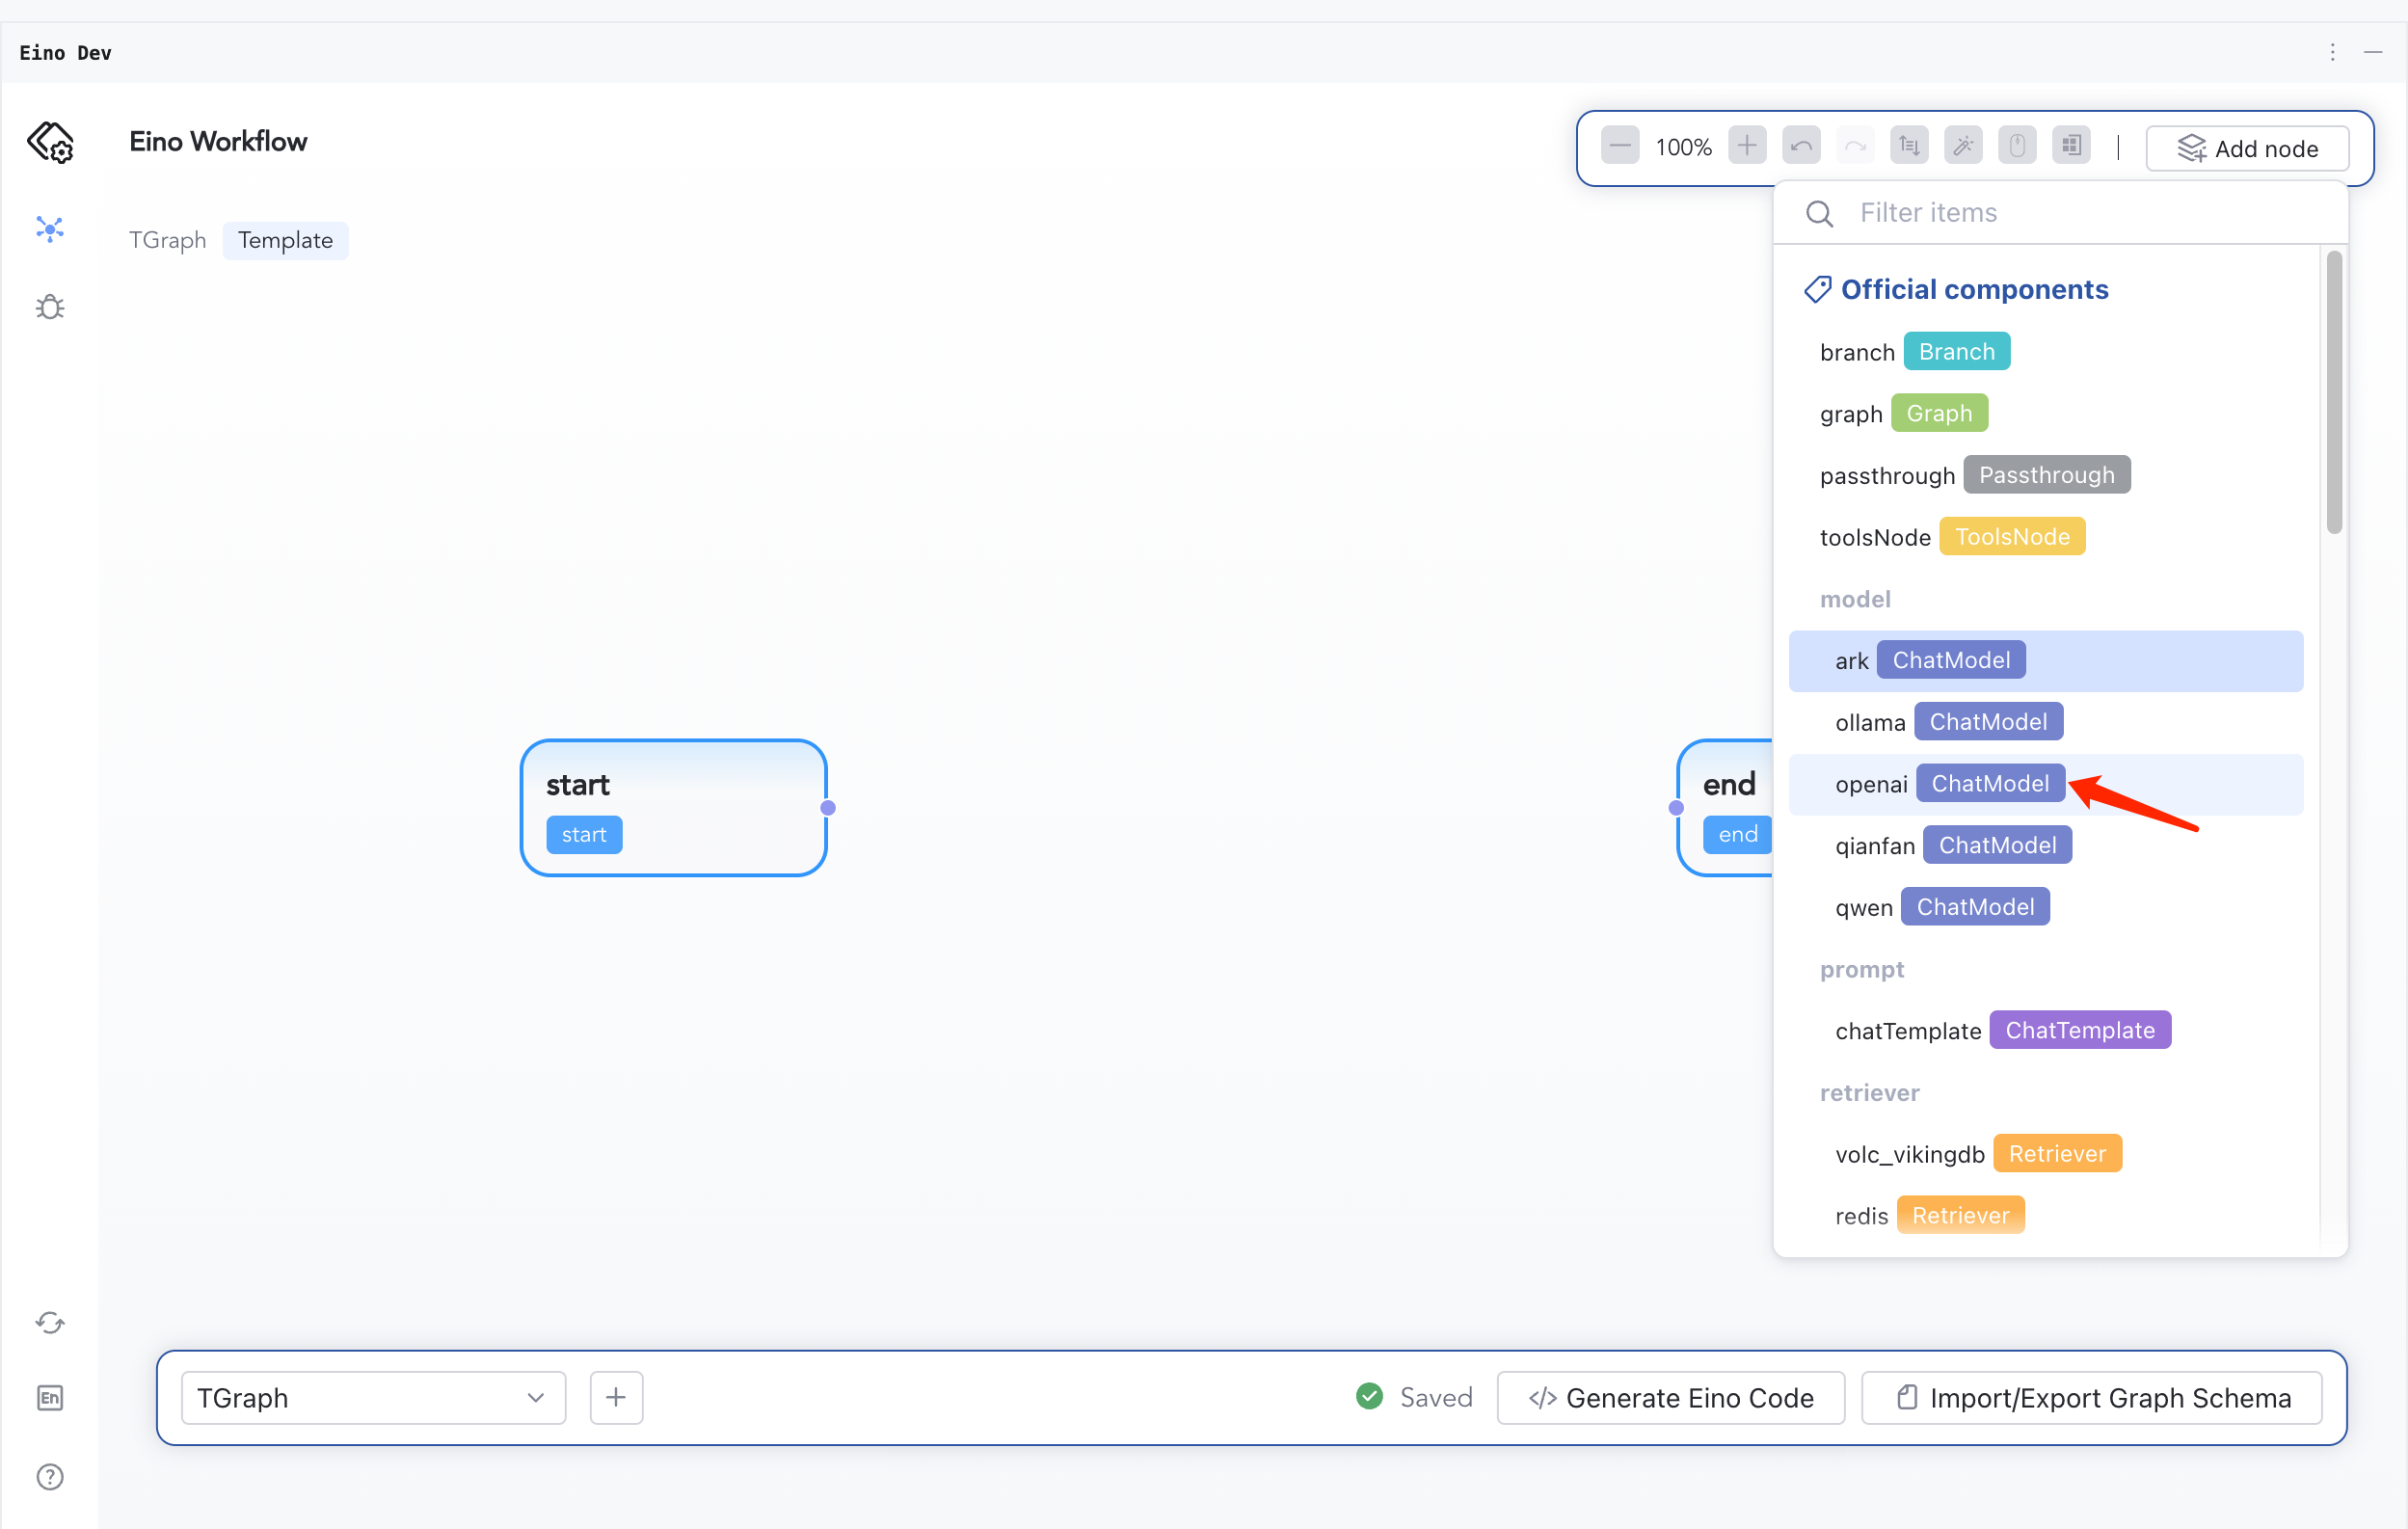
Component
- Component is essential information that constitutes a Node. Different Components correspond to different Node types and offer built-in Official Components and Custom Components.
- After completing the Add Node operation, you can configure the Component’s Runtime Config information as needed.
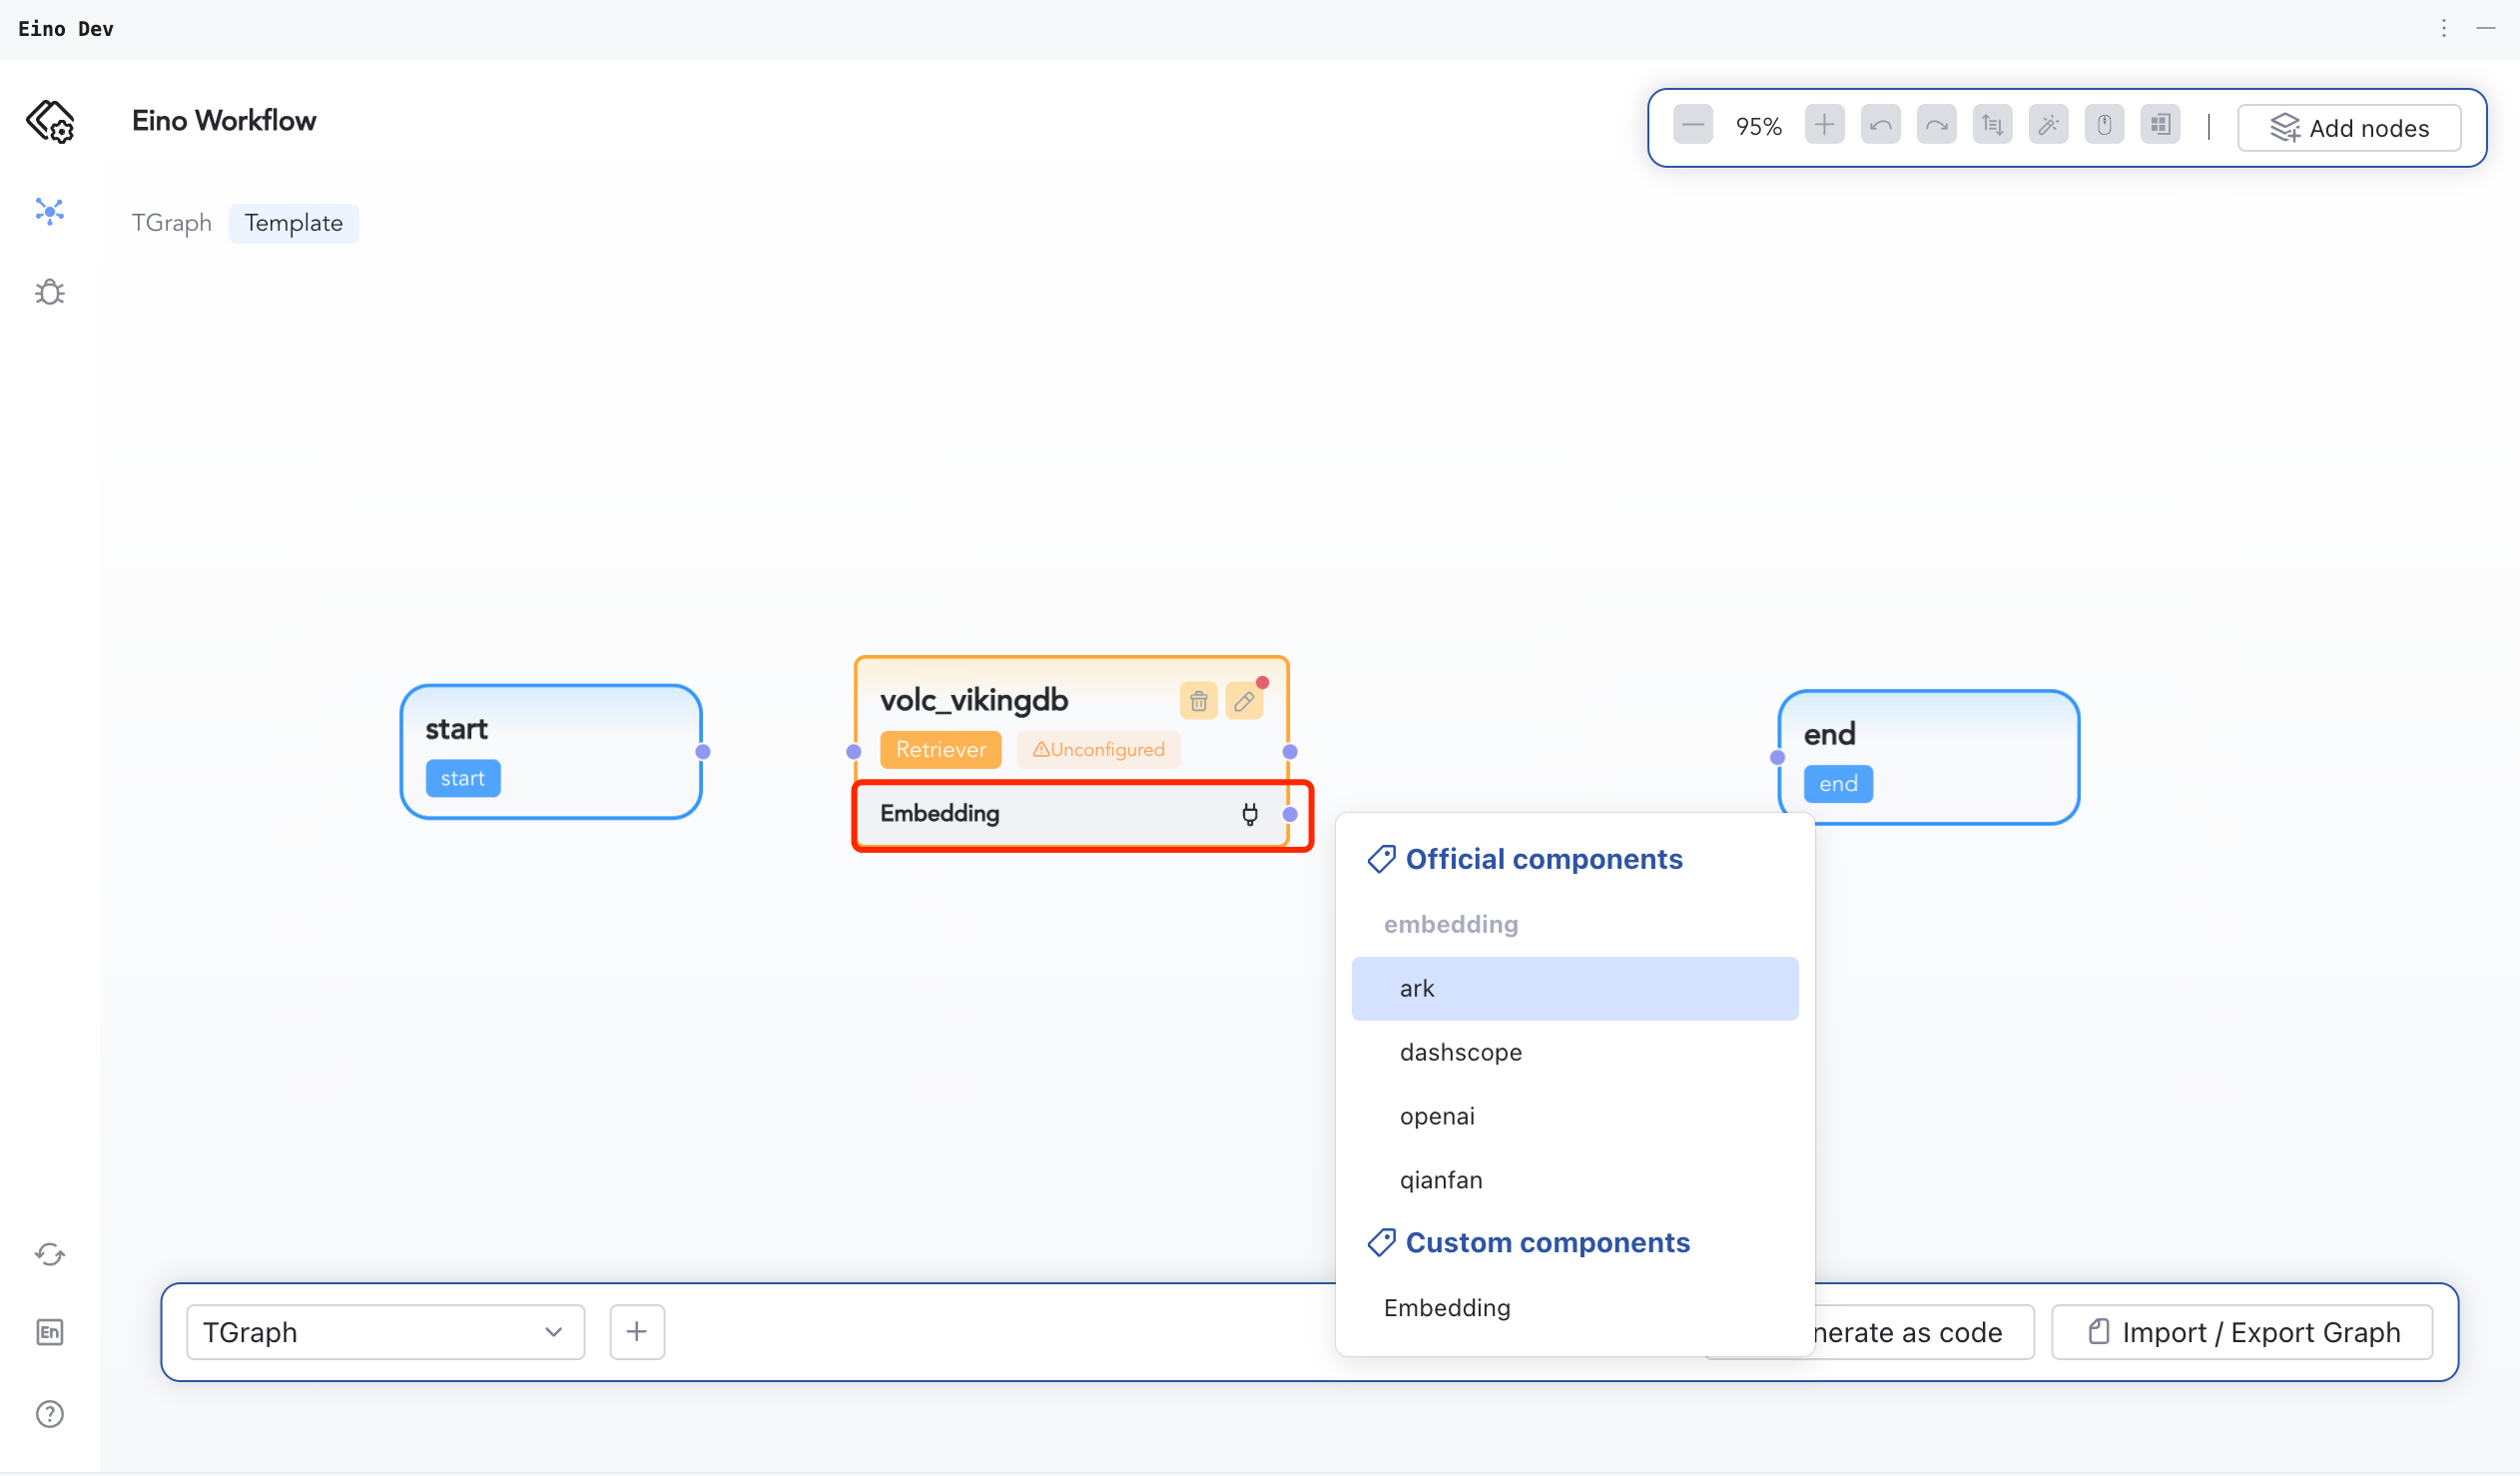
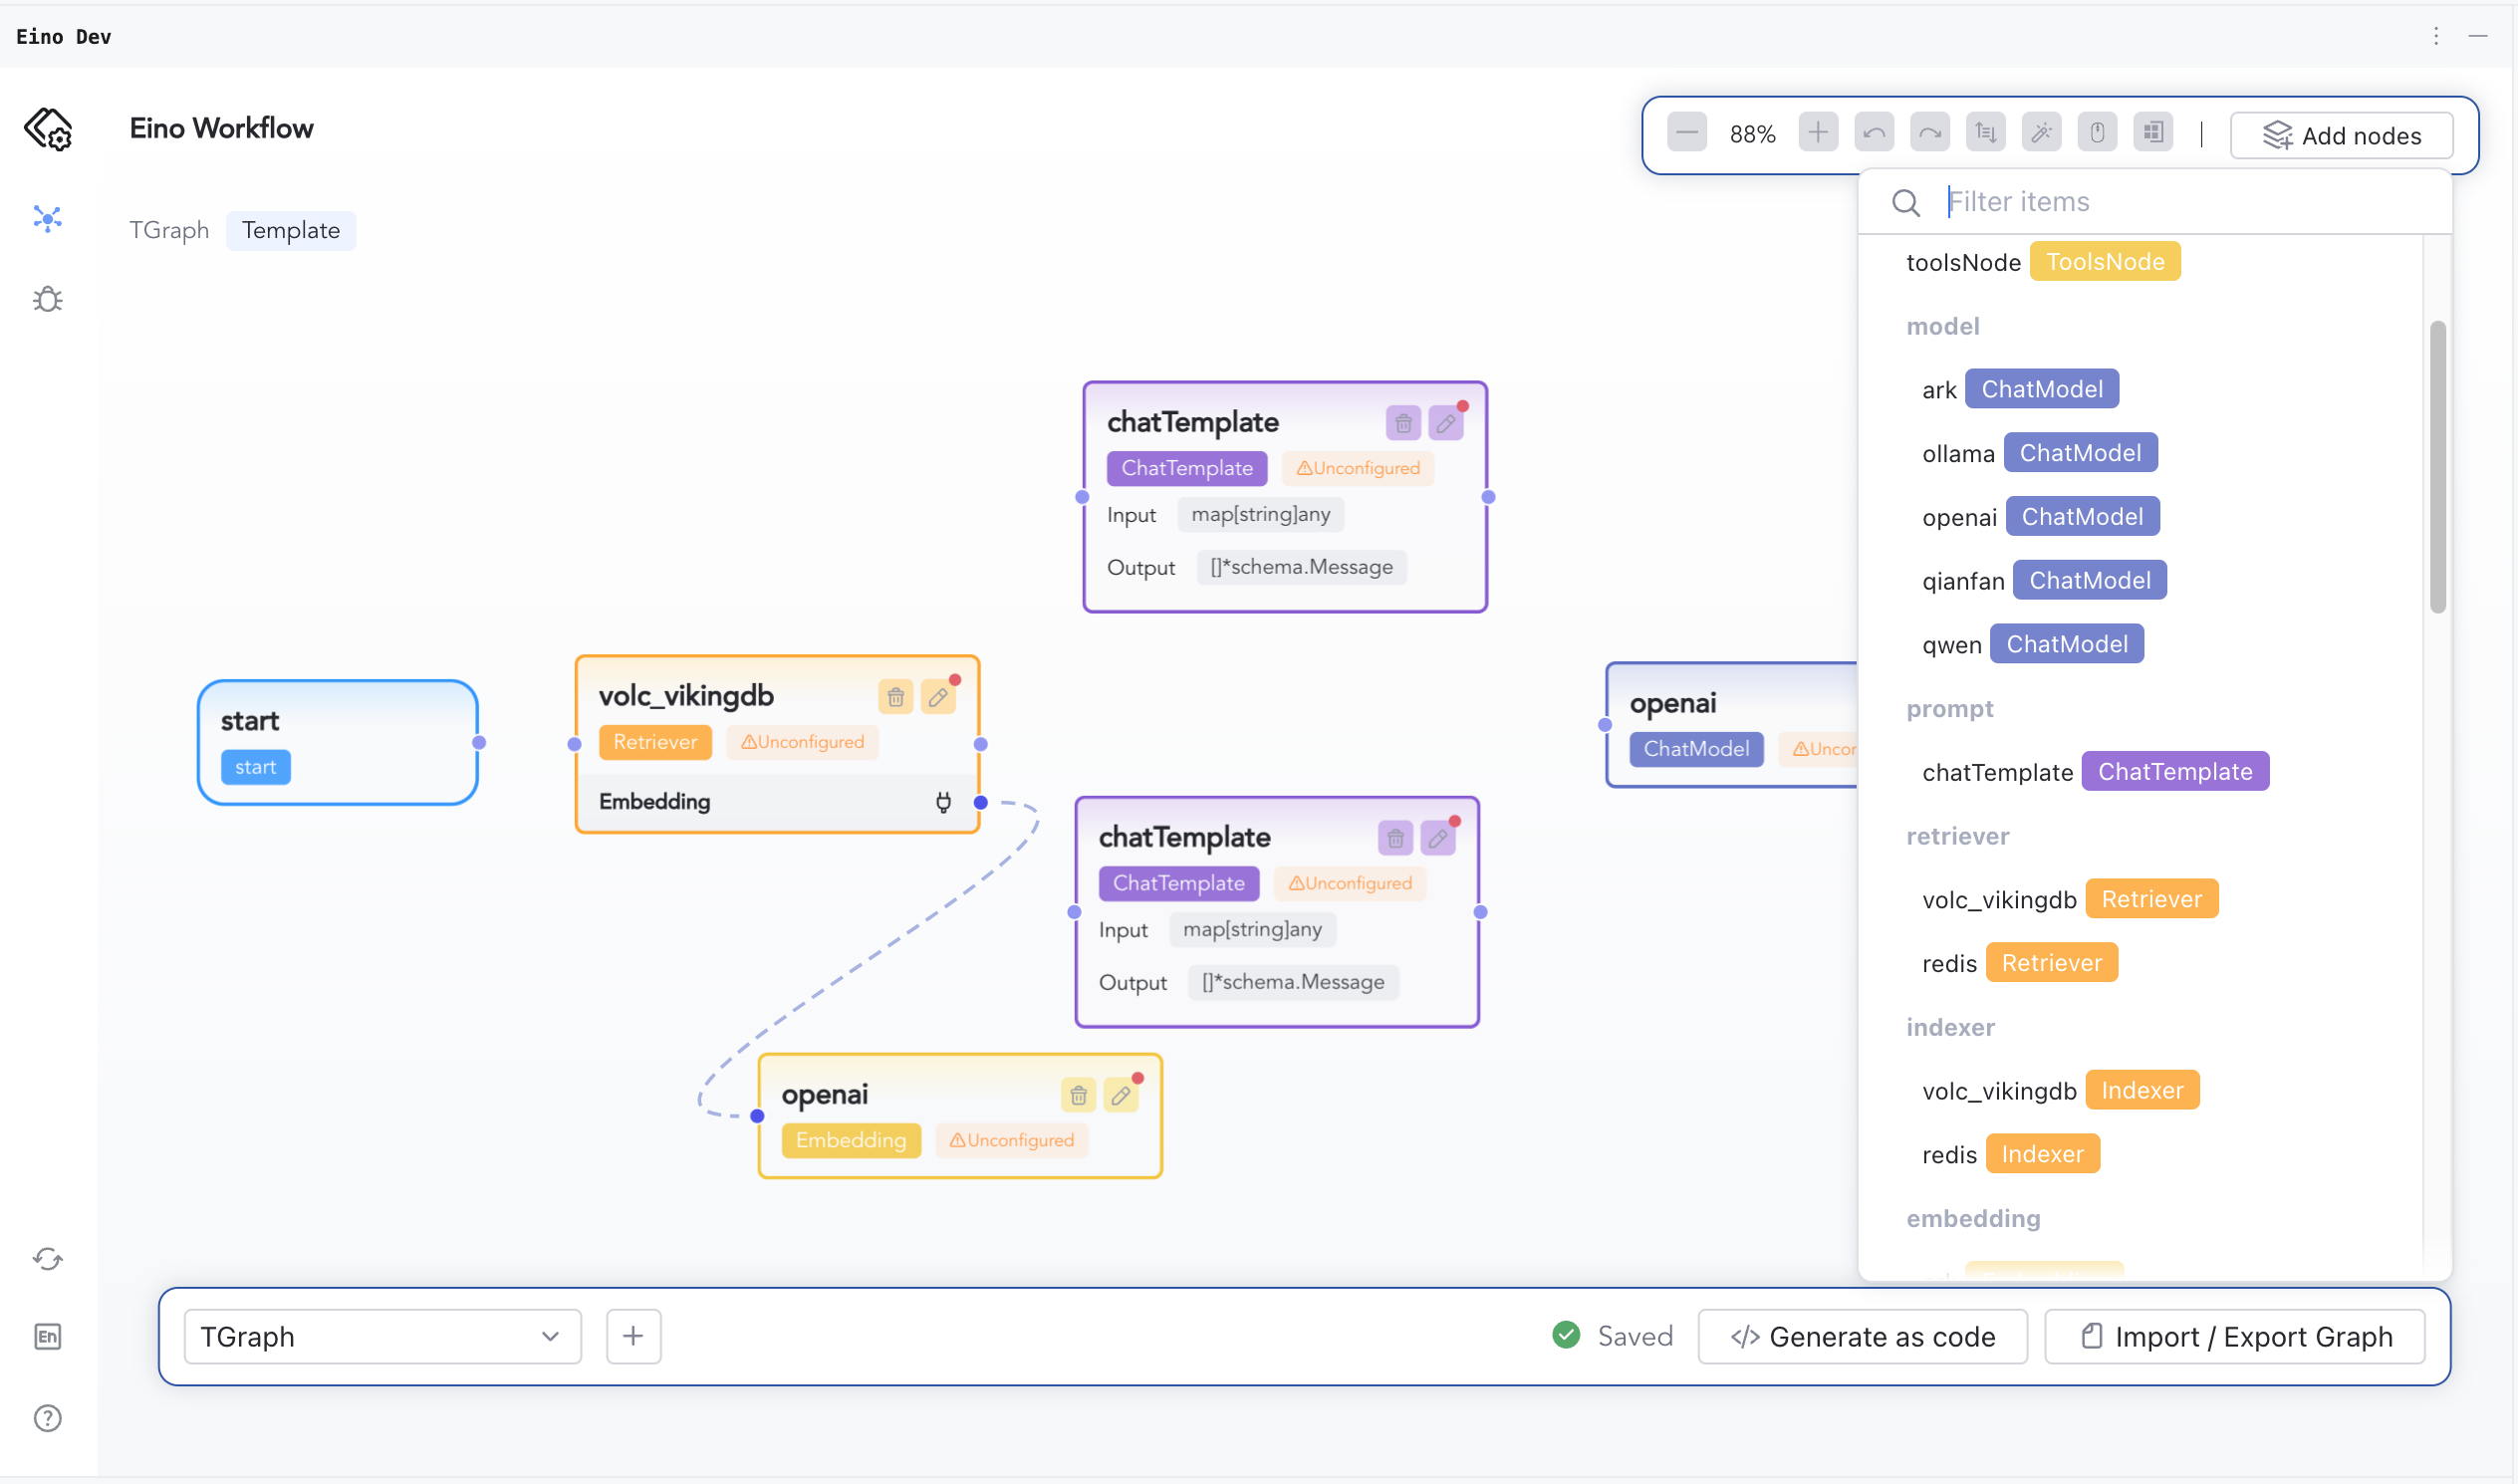
Slot
- The generation of different types of Components will rely on other components, using them as part of their own configuration dependencies. This part of the dependency is called Slot.
- For example, the official volc_vikingDB component relies on the Embedding Component as a Slot. Similarly, the official ToolsNode component relies on multiple Tool Components.

Start Orchestrating
Initialize Plugin
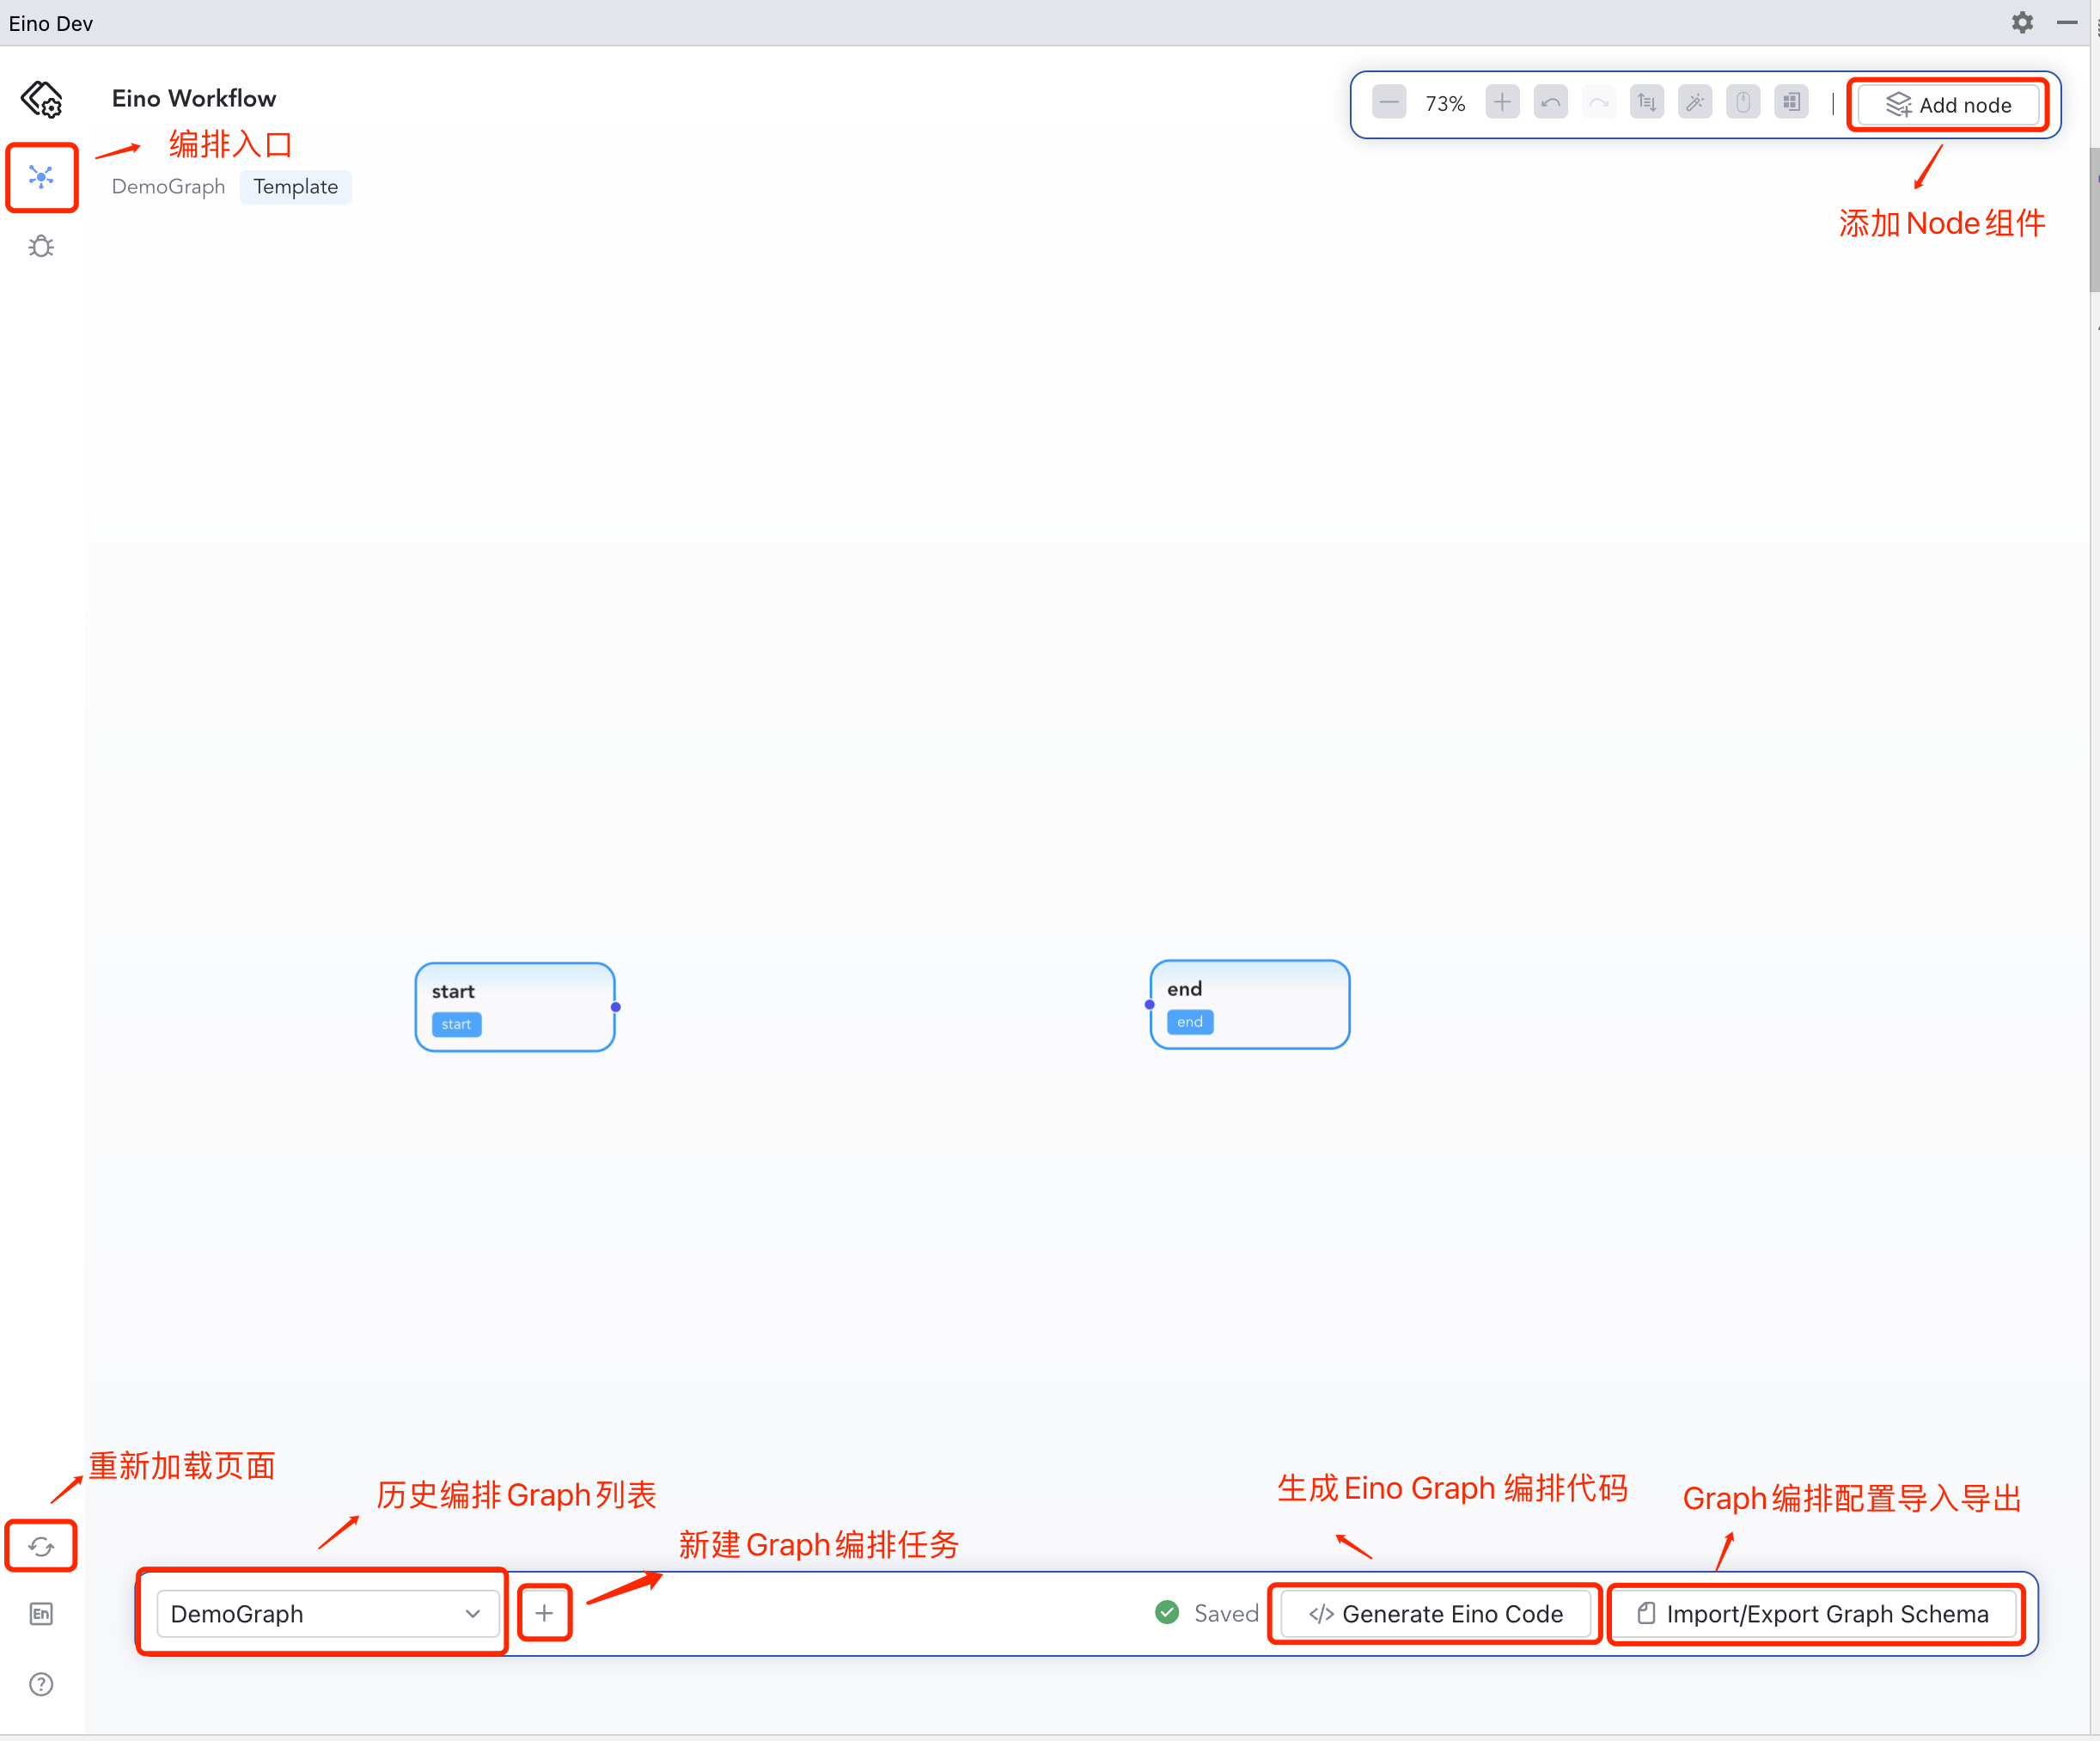
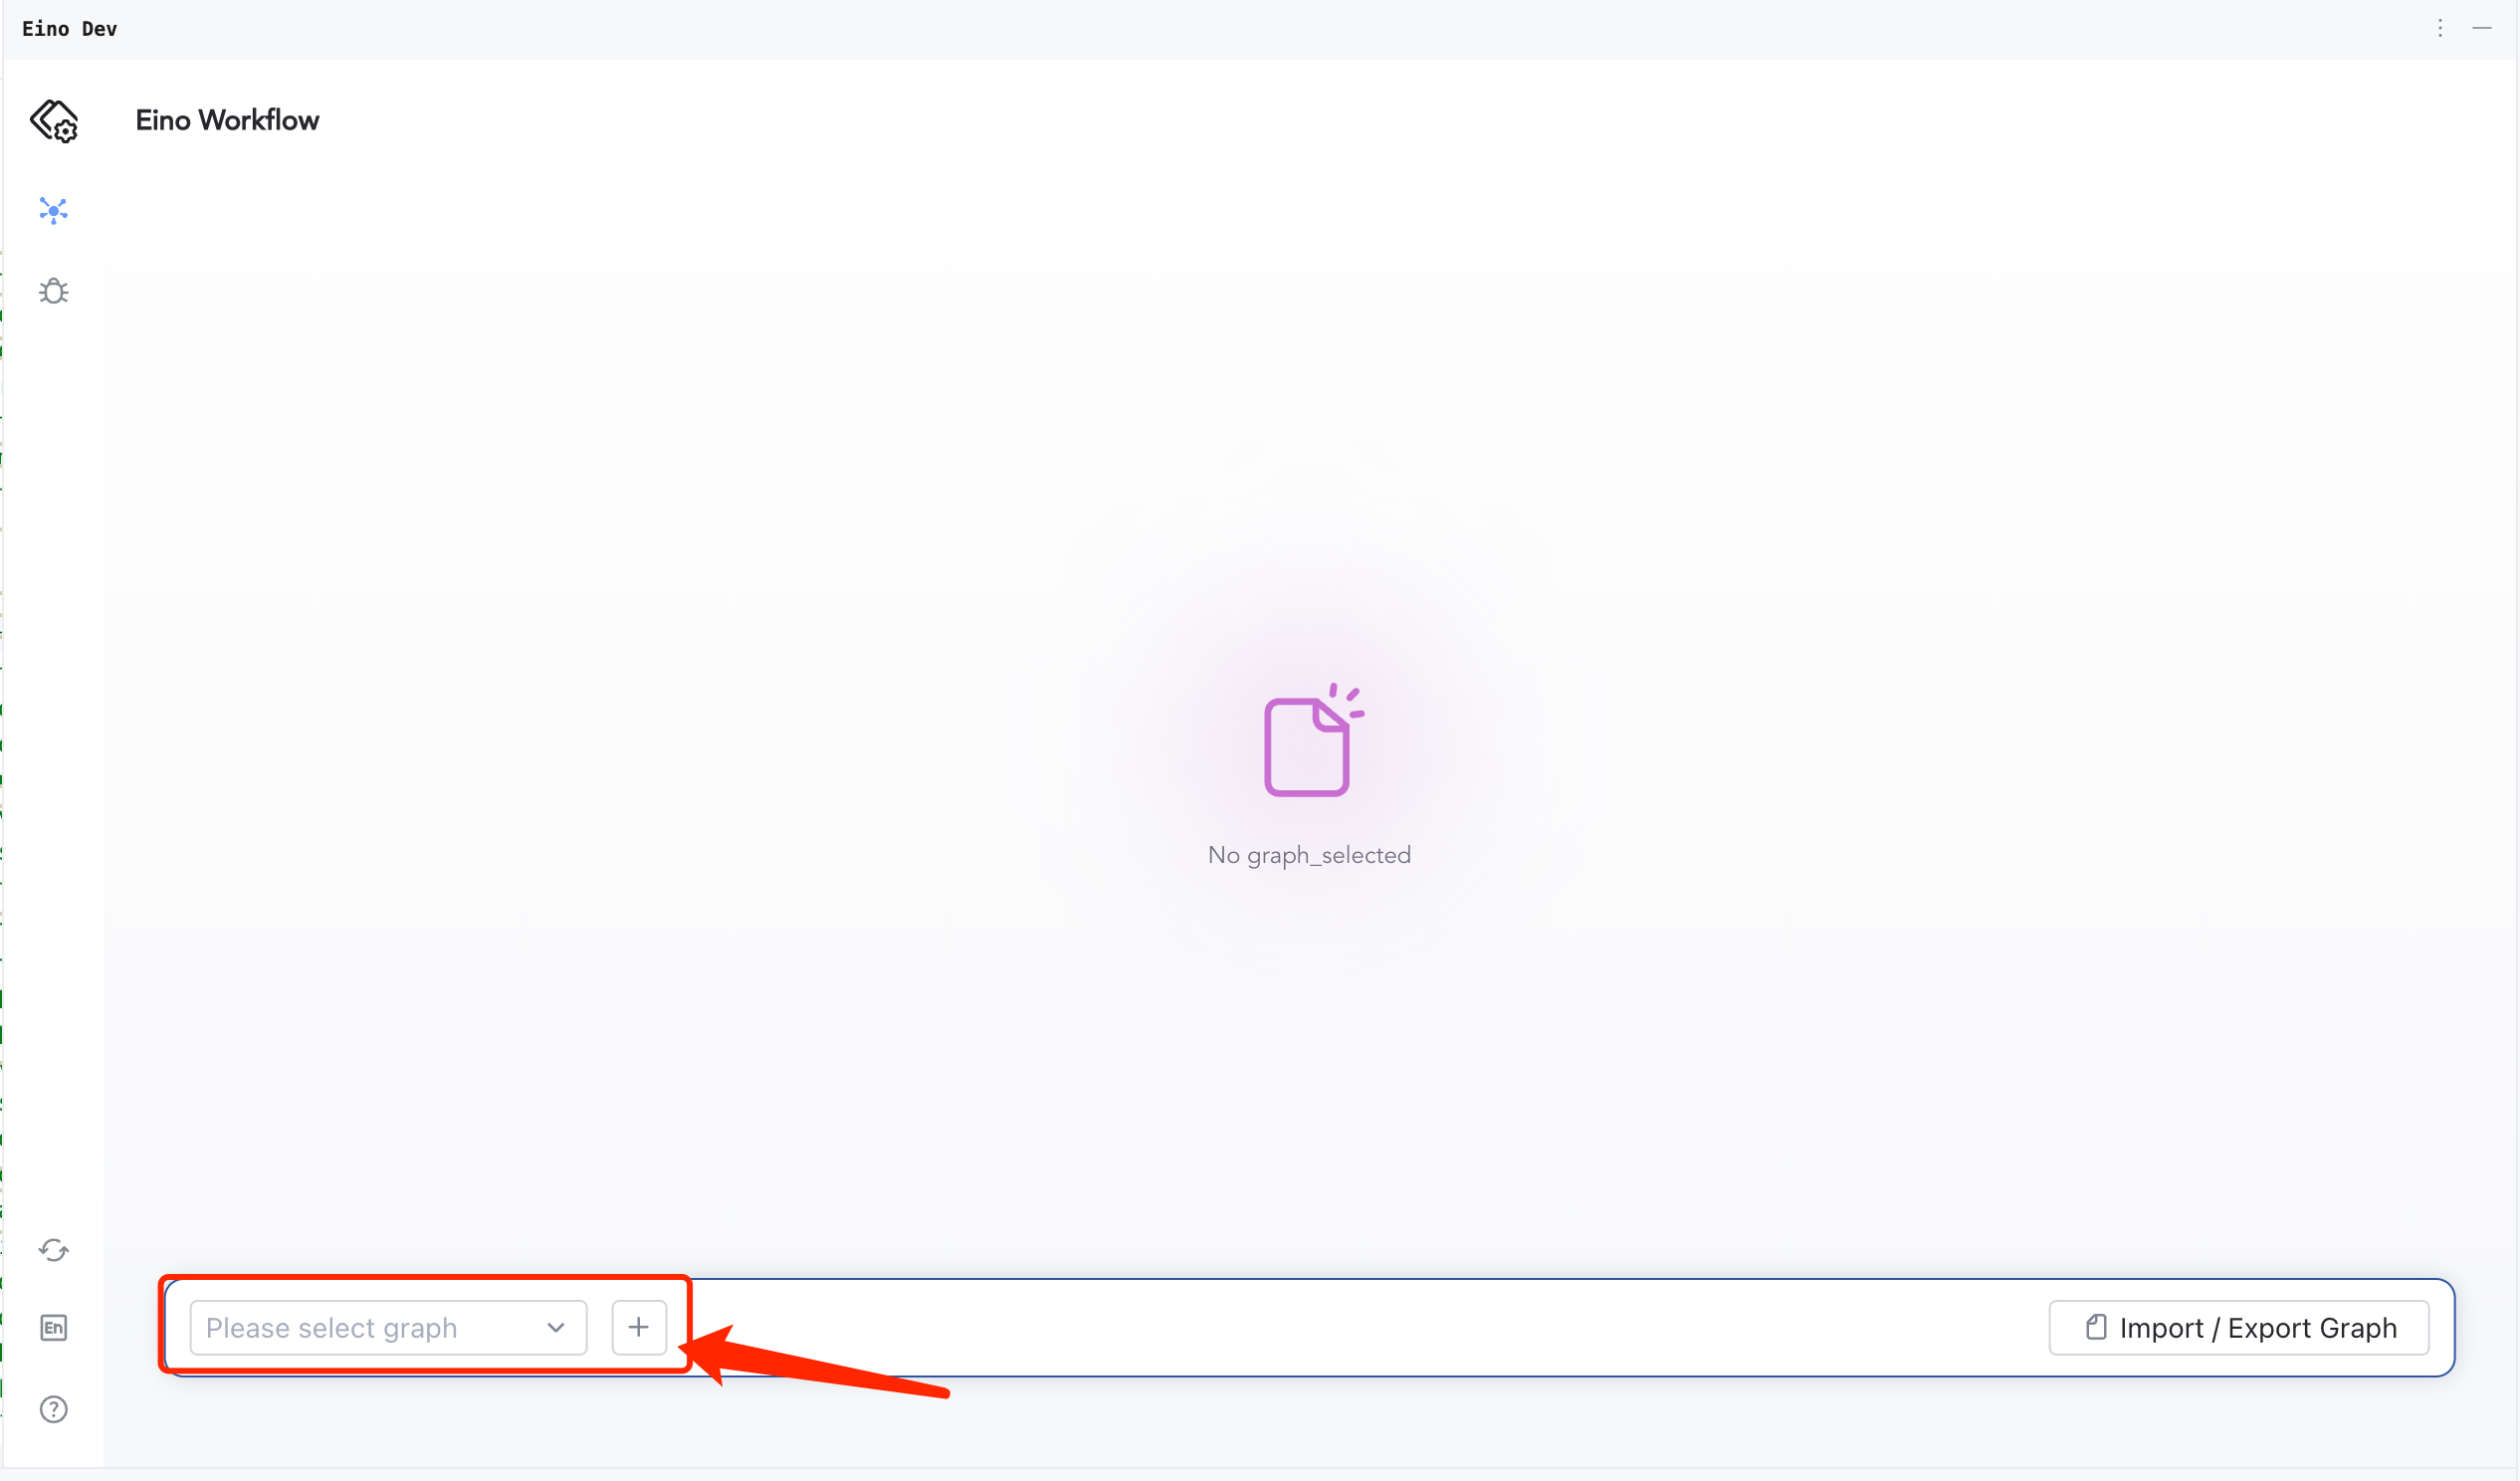
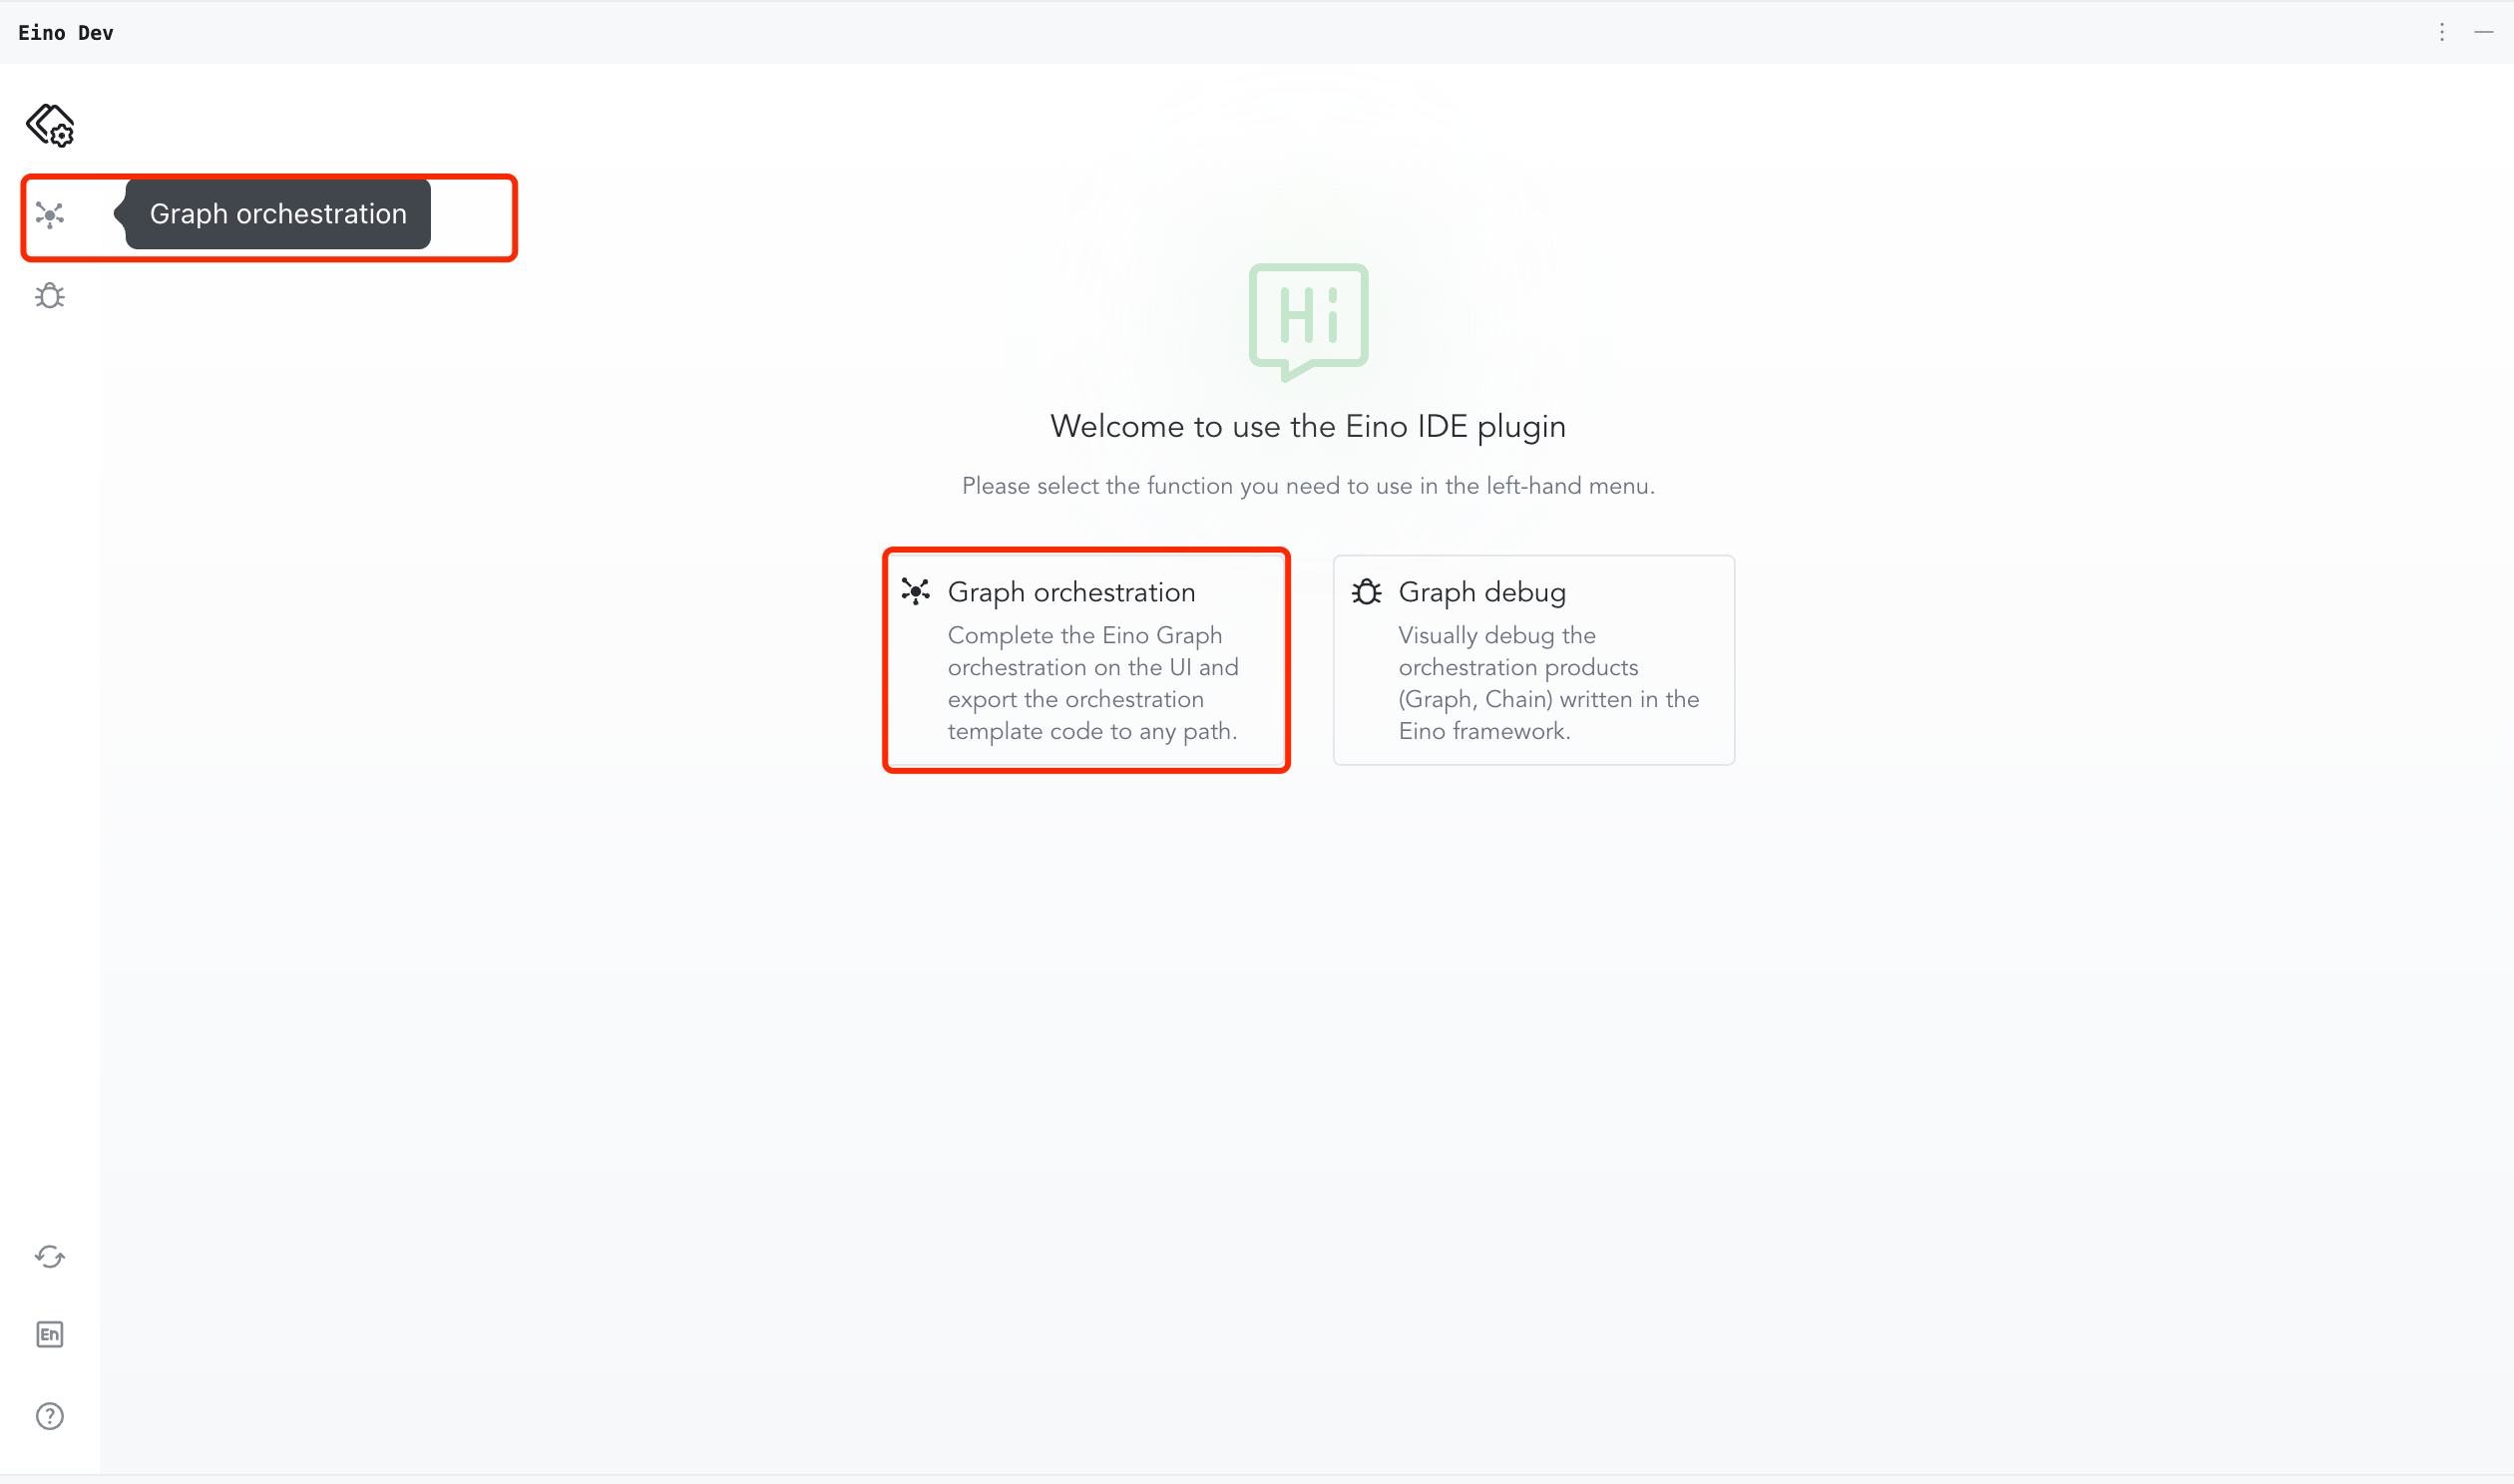
Click to enter the Eino Dev plugin, the following interface will be displayed. Click the circled box in the image to enter the orchestration.
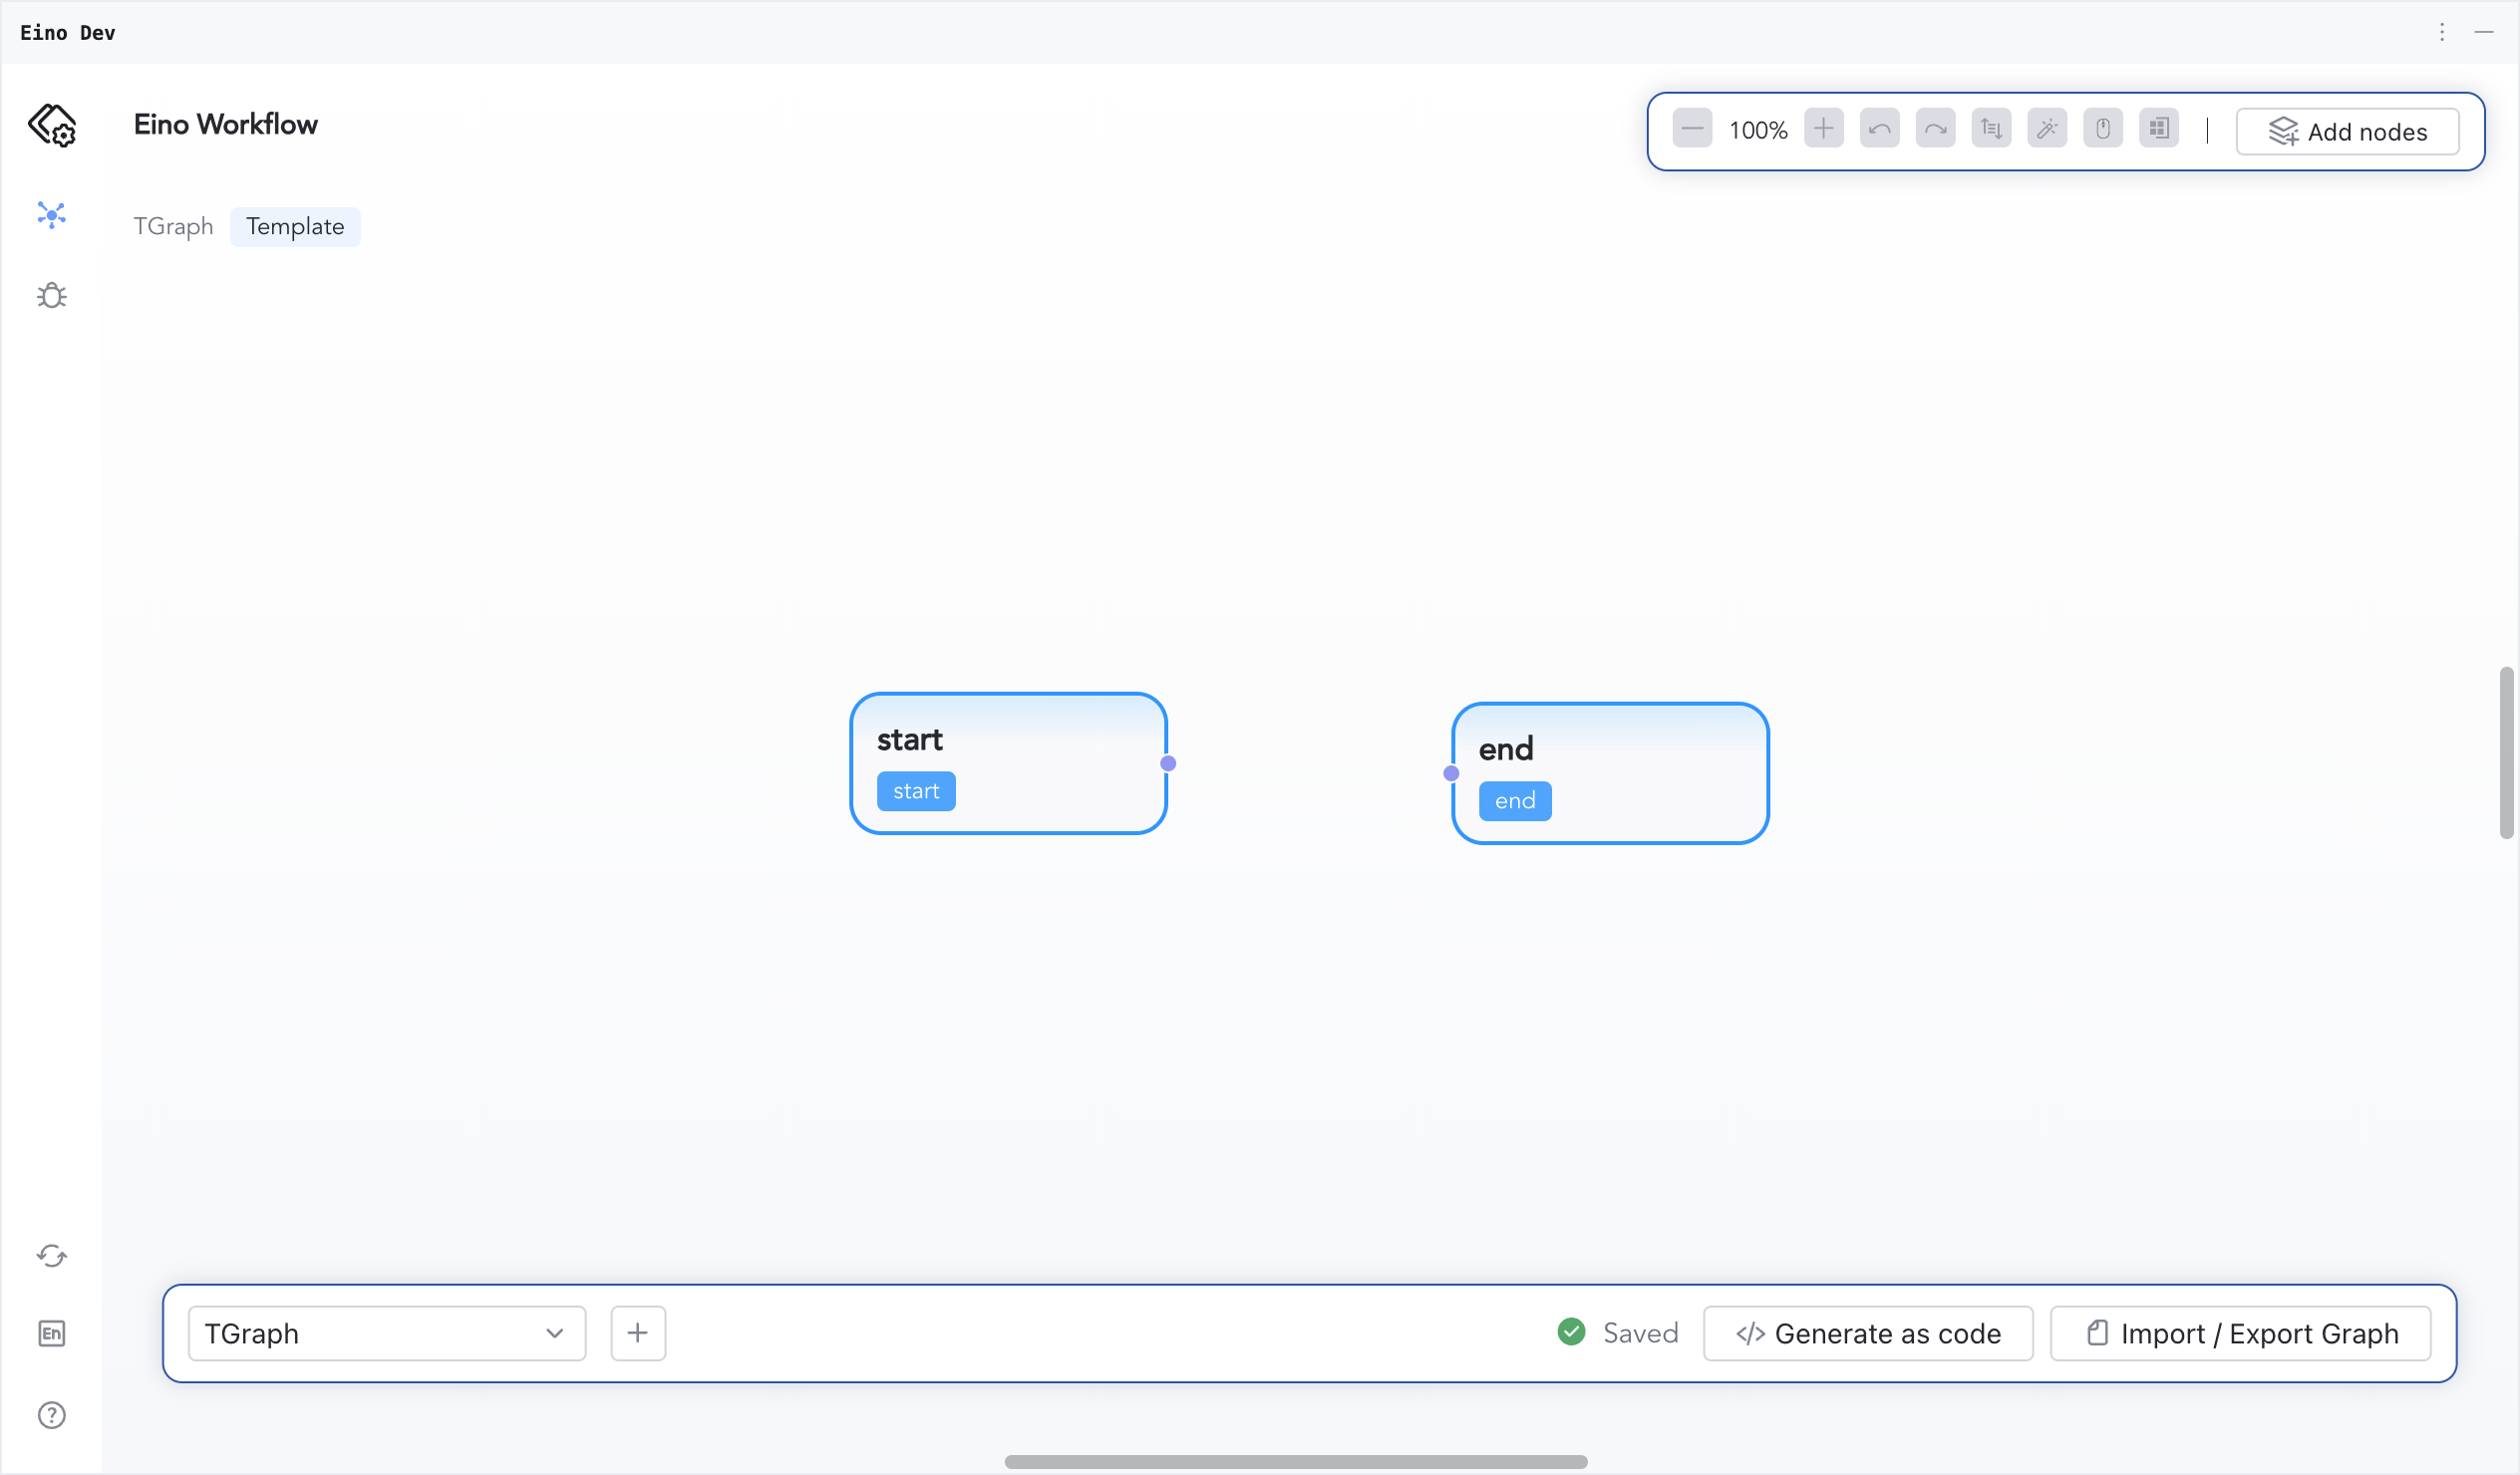
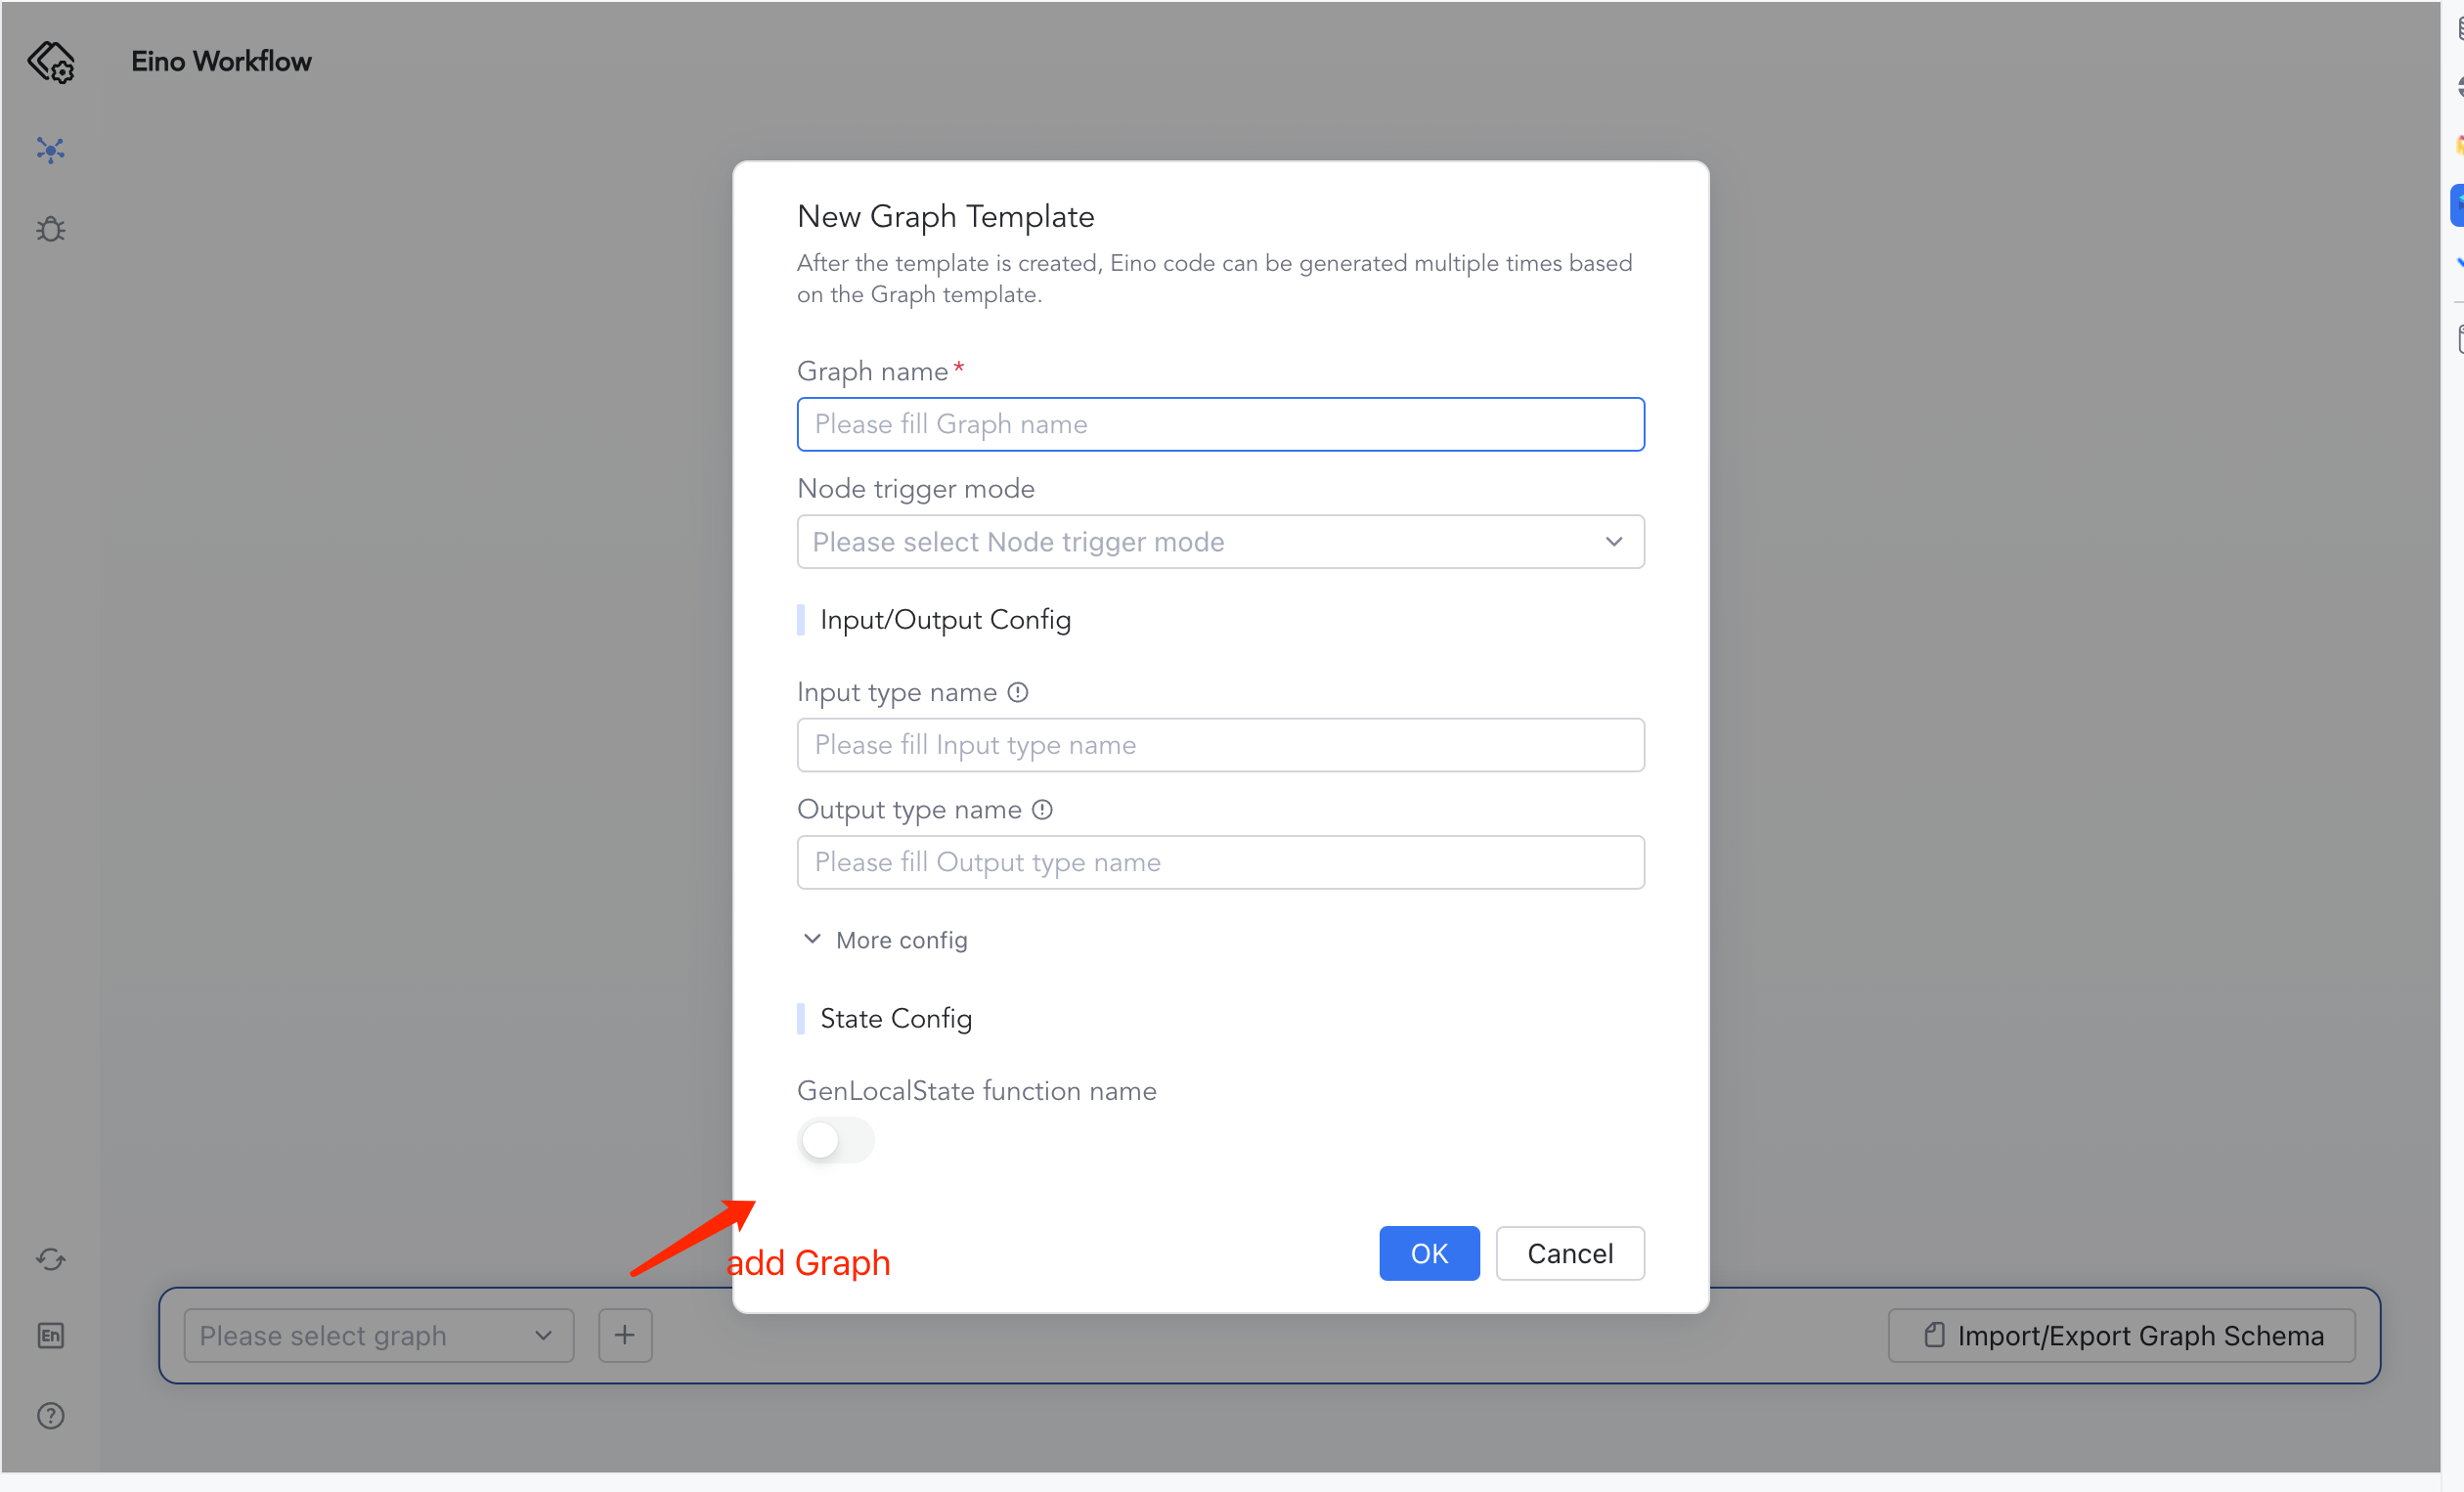
Create and Orchestrate Graph
- A new Graph is added at the bottom left corner of the interface. Fill in the relevant Graph configuration in the pop-up dialog box to generate the Graph canvas.
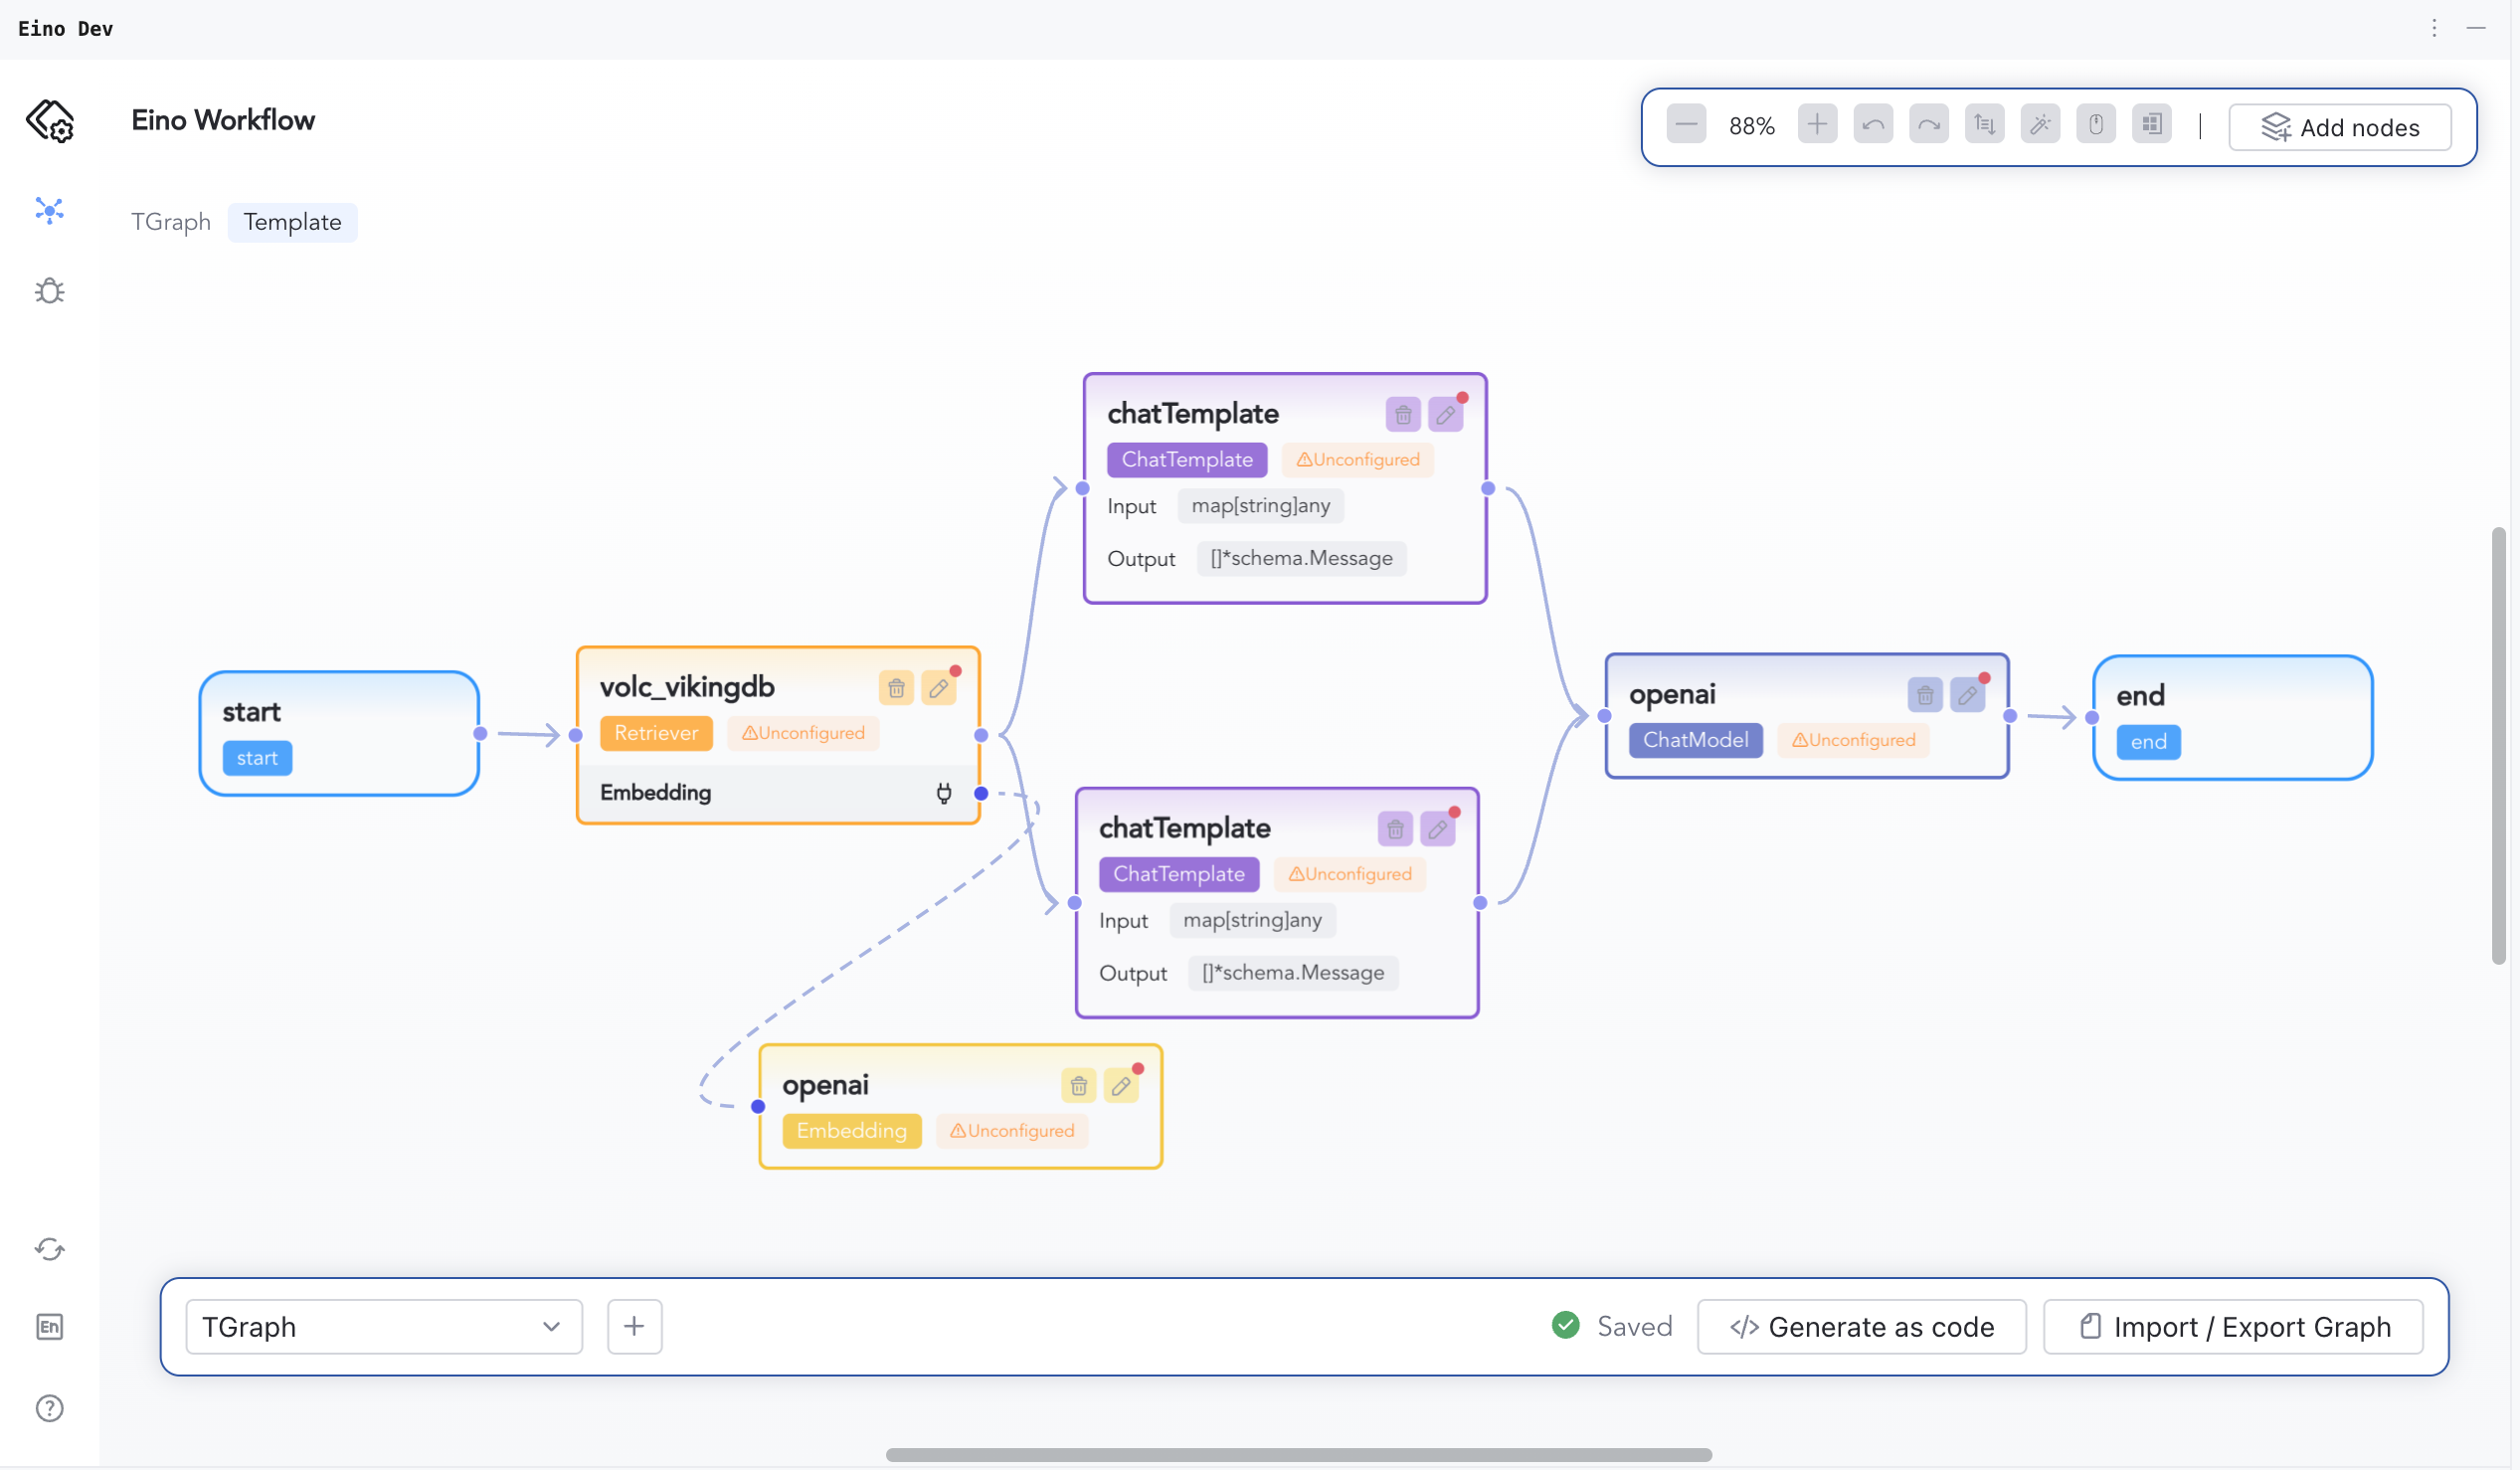
- Select suitable Node components from AddNodes as needed and add them to the canvas.
- Connect the Node components according to the business orchestration logic to complete the Graph business orchestration logic.
|
|
|
|
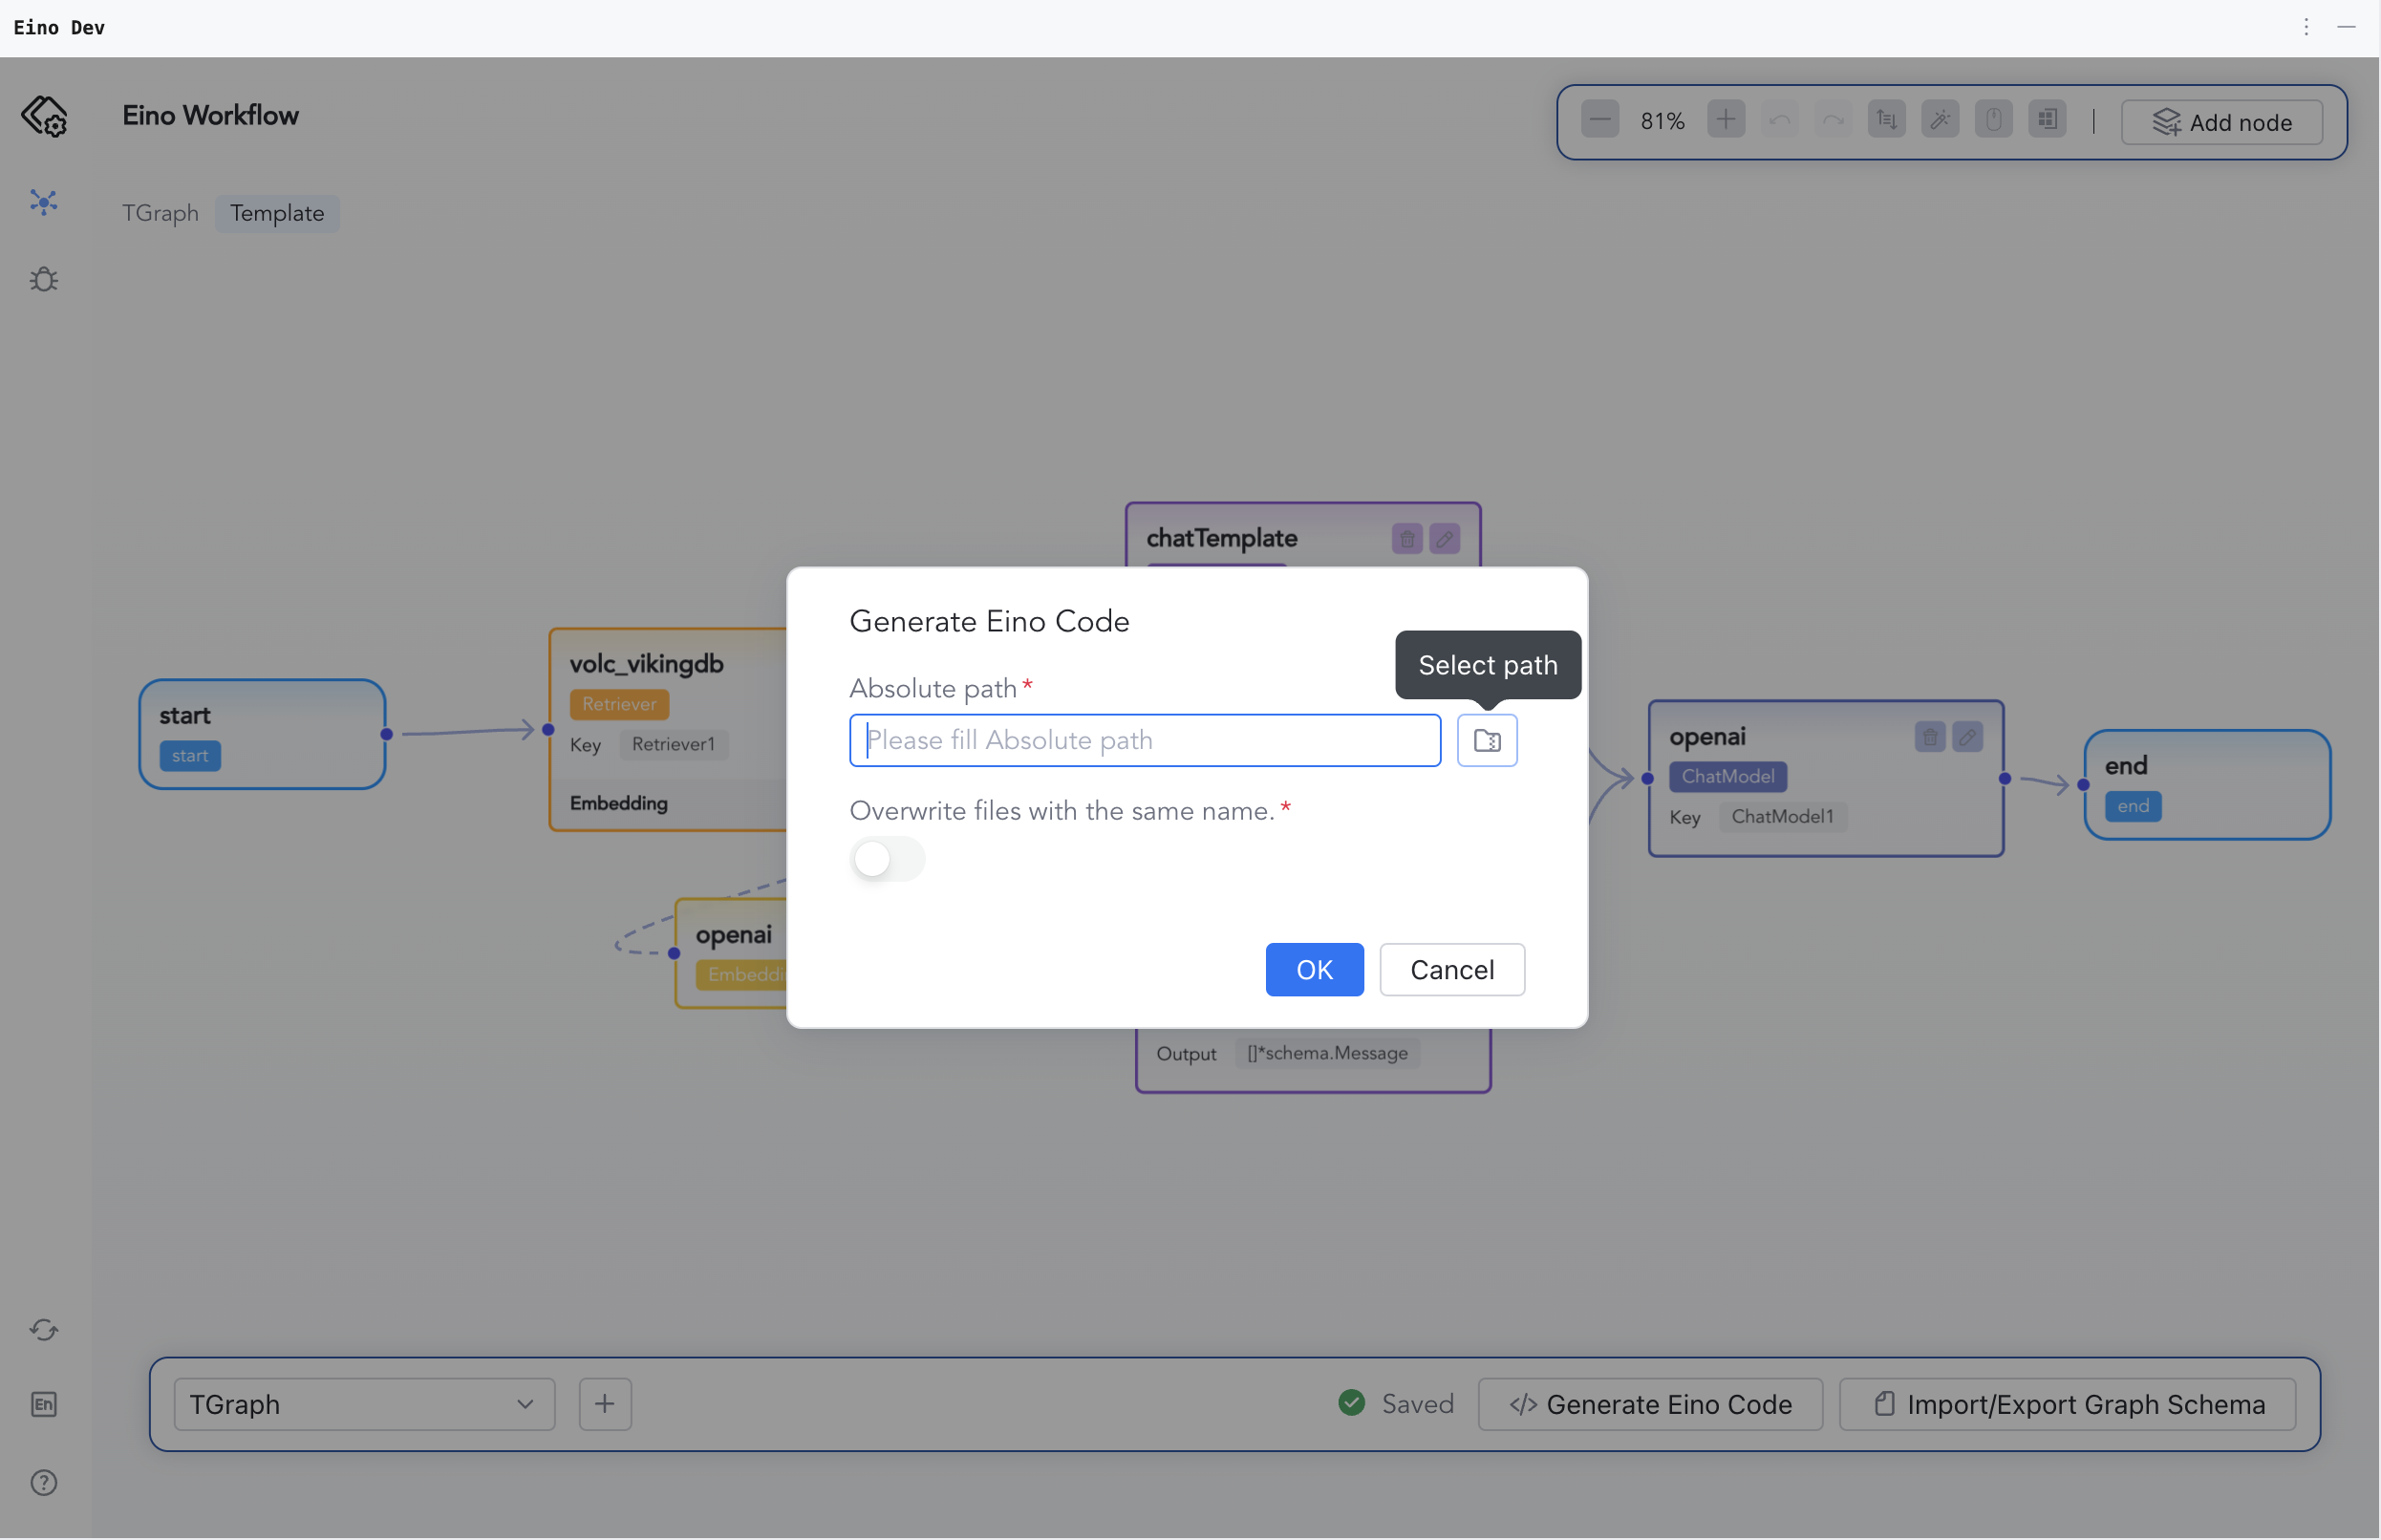
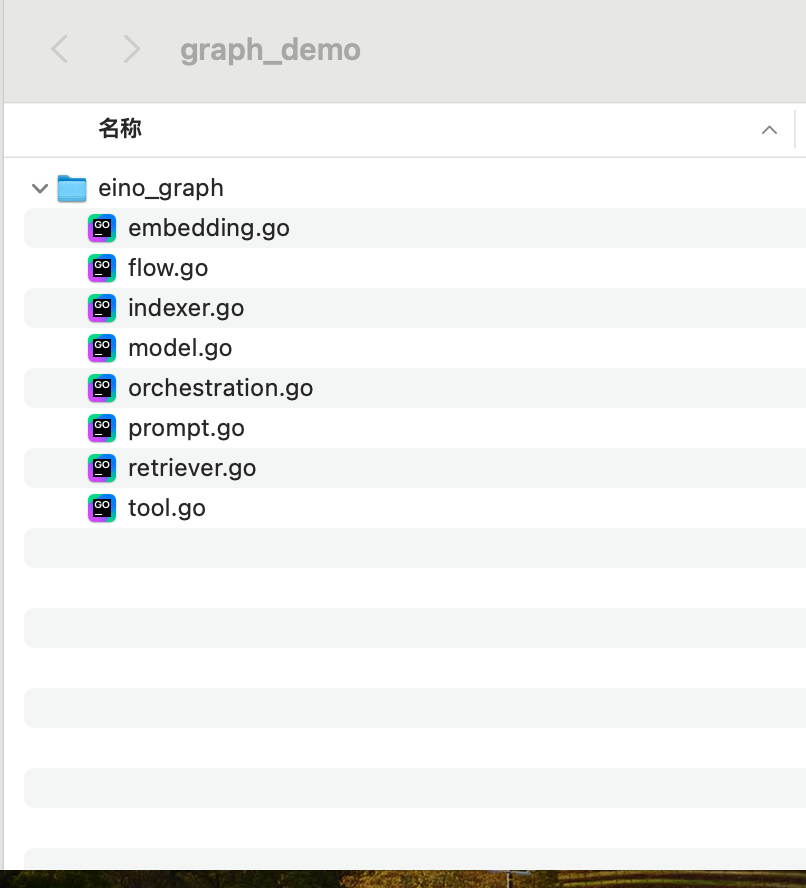
- Click “Generate as code” and select the appropriate folder to generate the orchestrated Graph code and save it to the specified path.
|
|
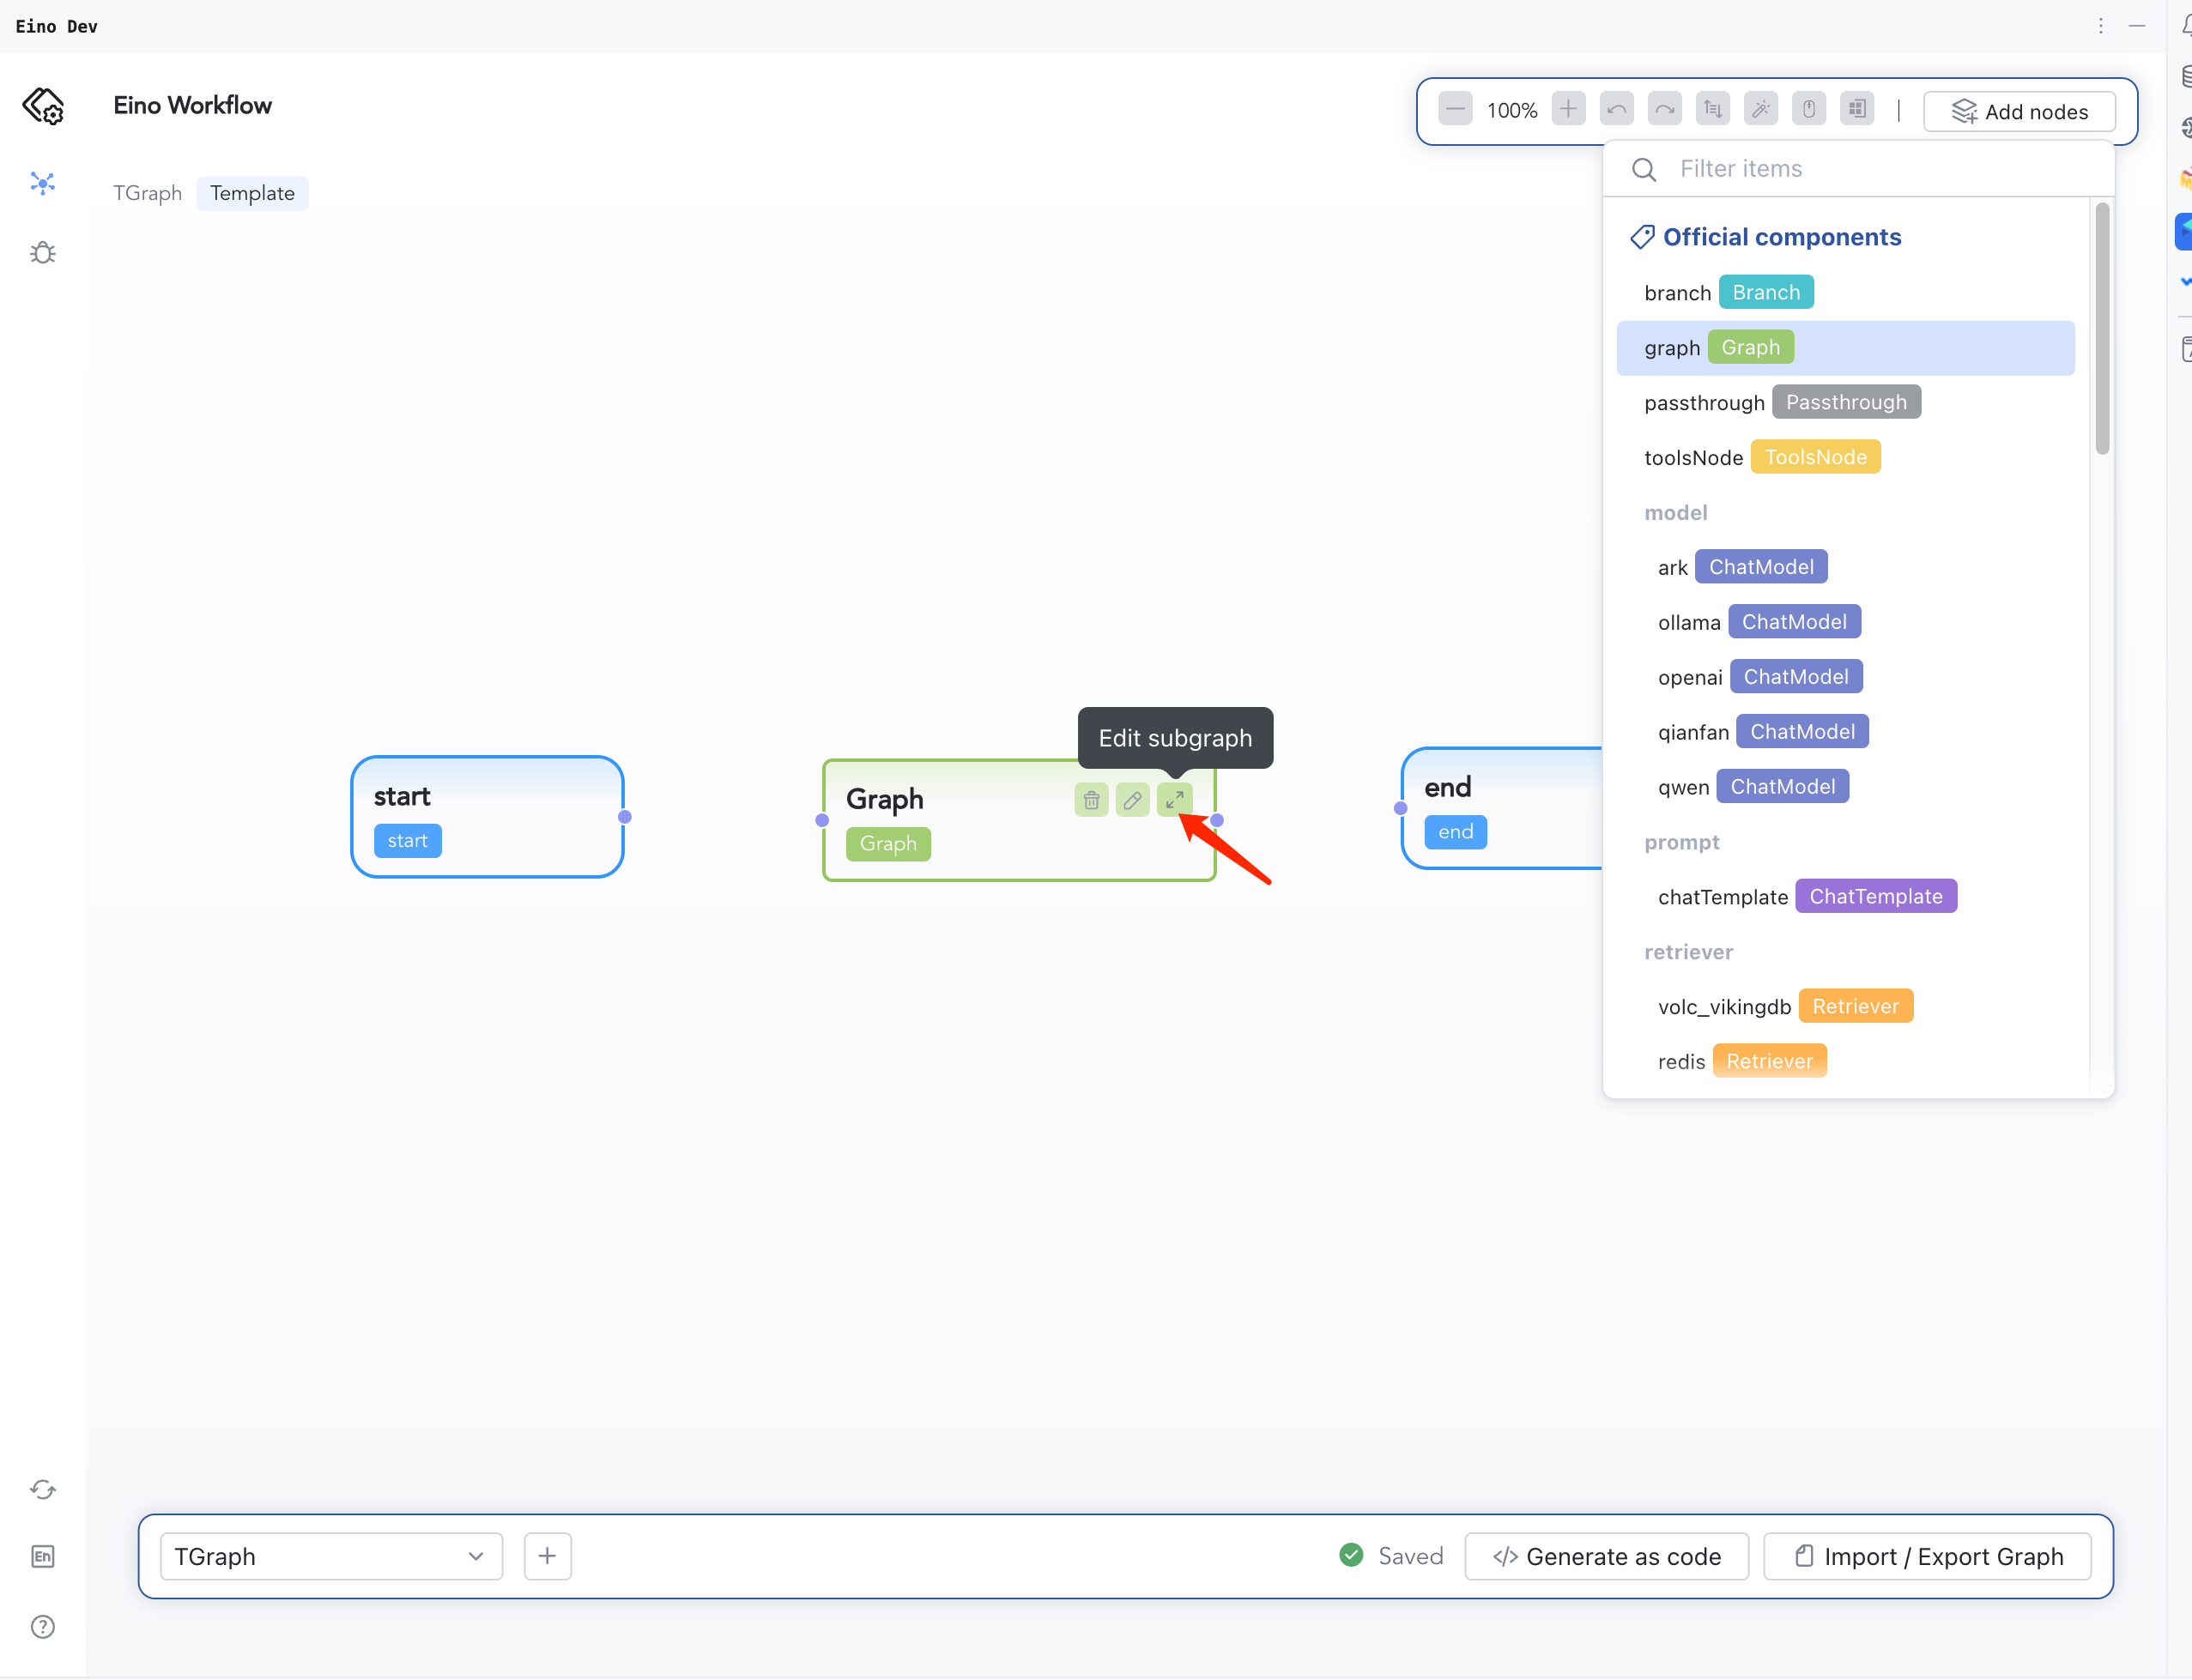
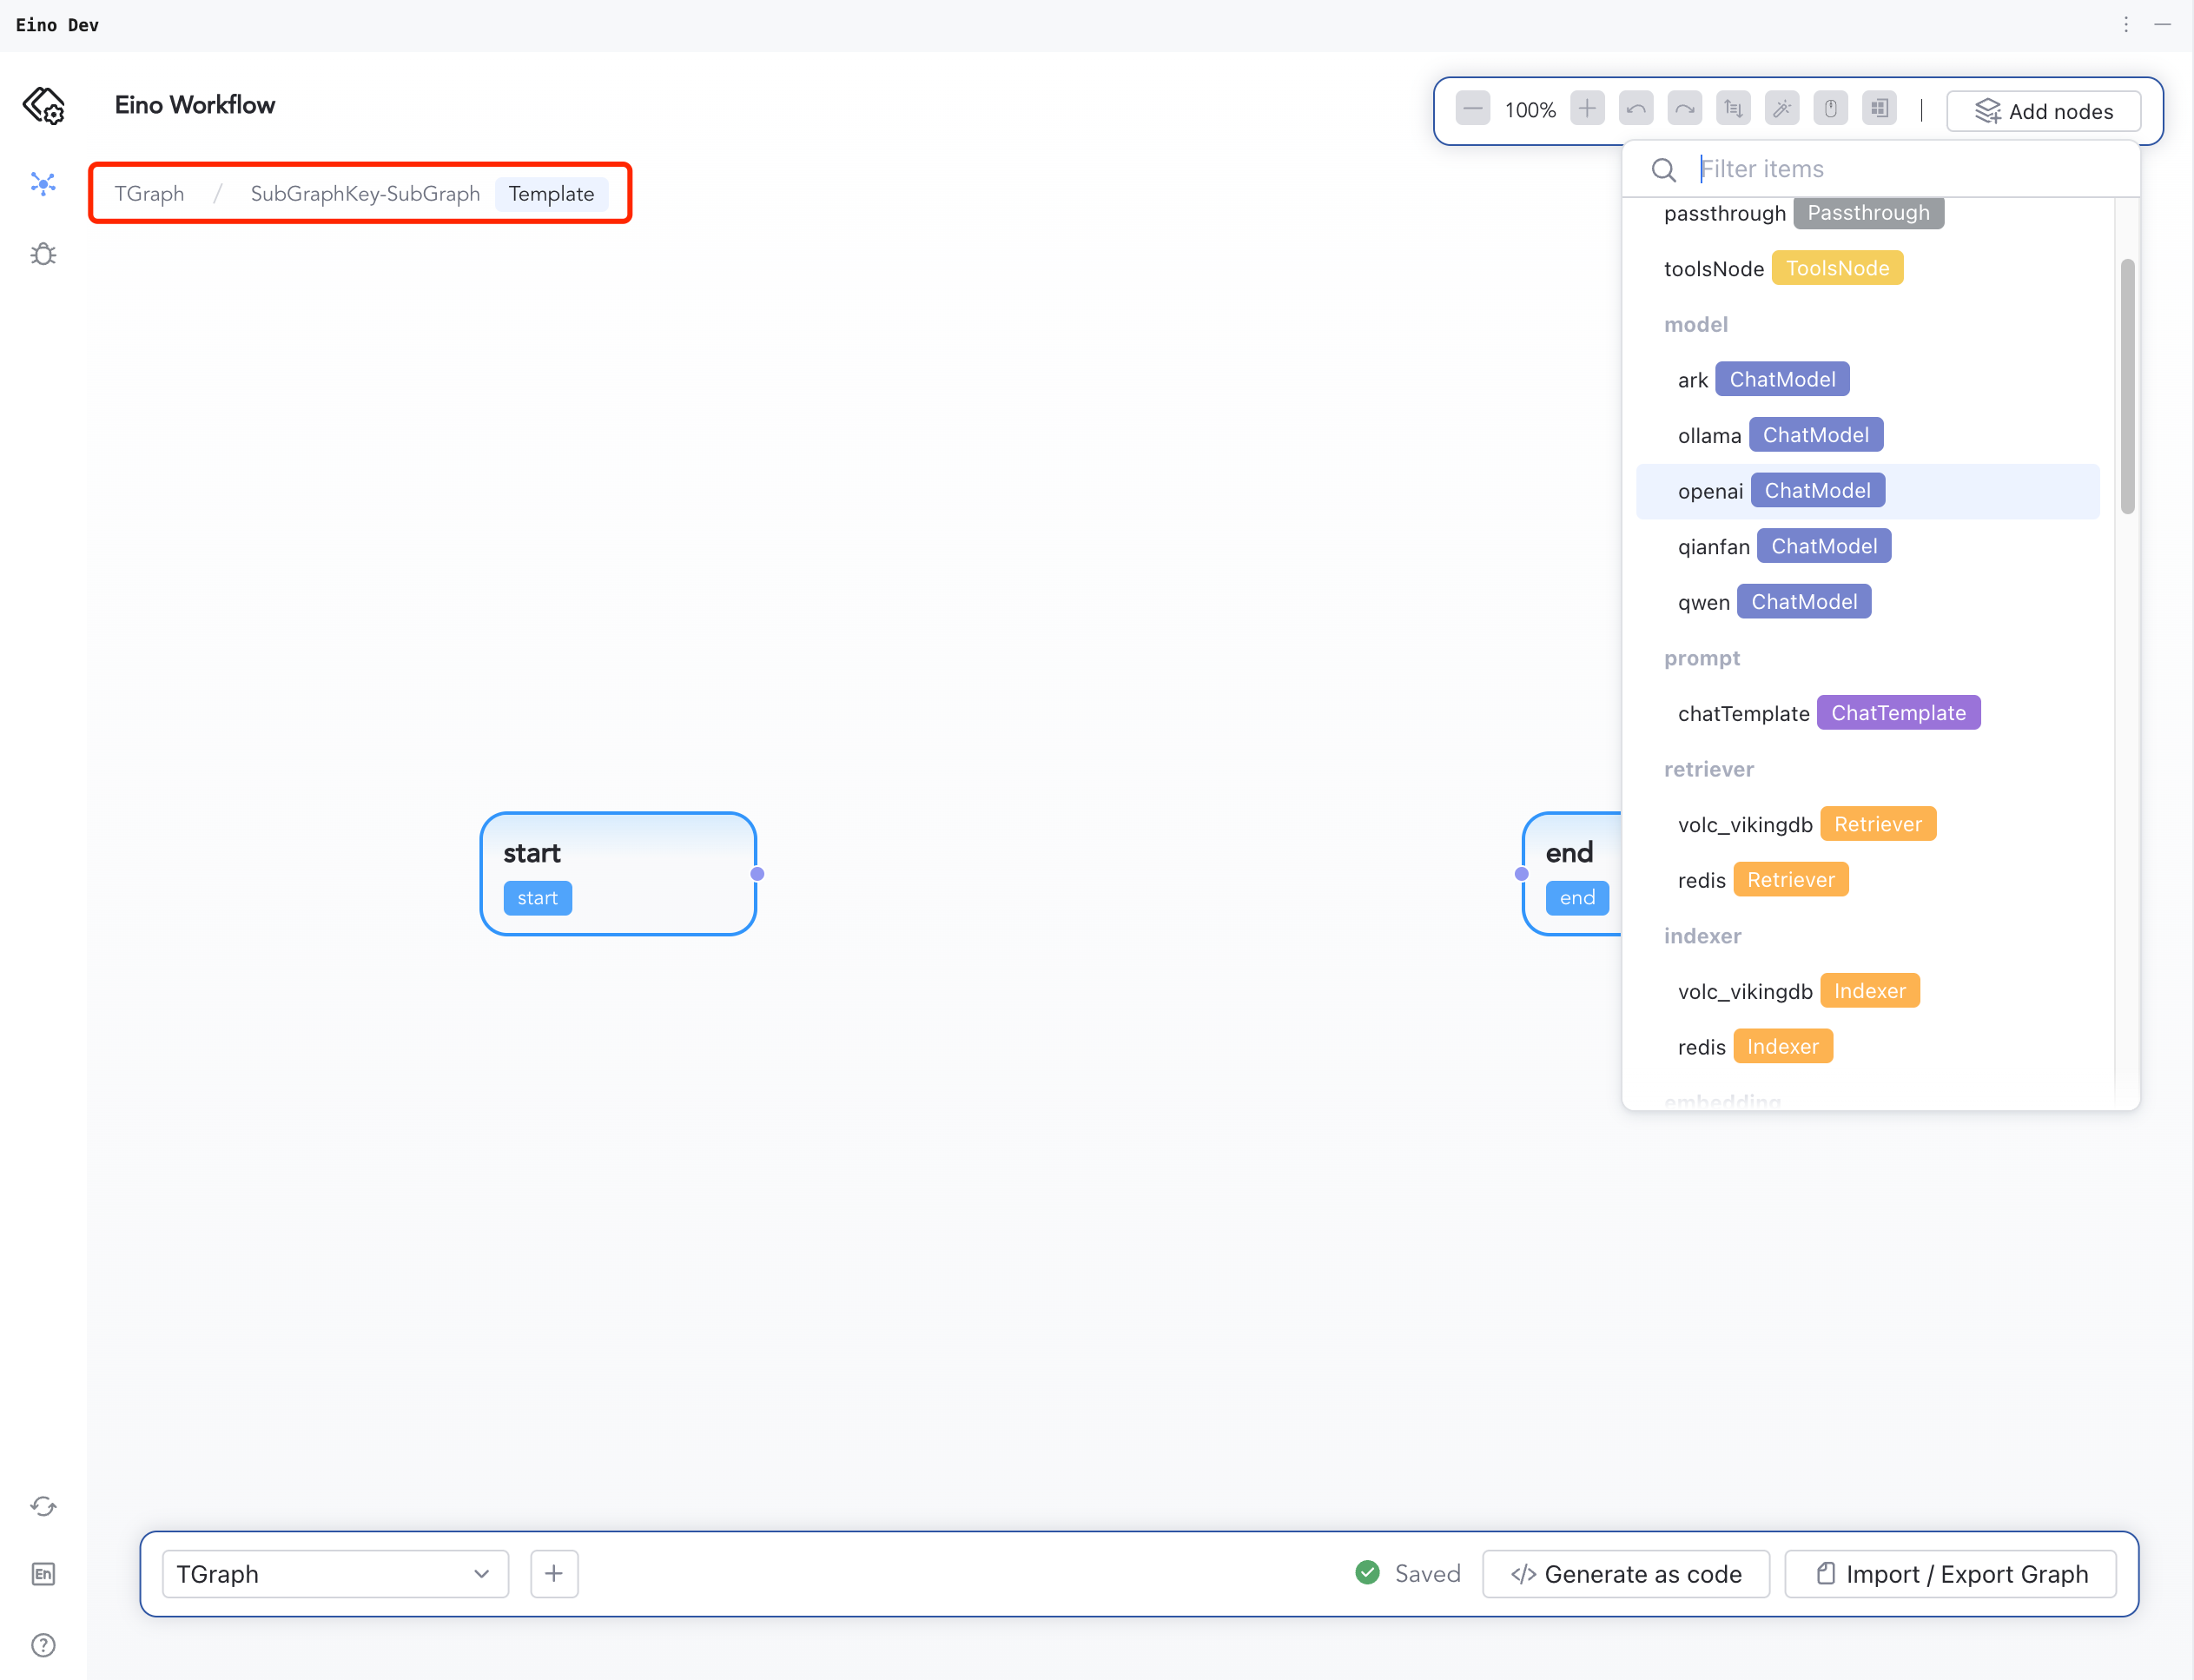
- Especially when the added Component is of Graph type, the nested Graph can be expanded to configure each Node component. After configuration, return to the home interface through the top breadcrumb path.
|
|
Last modified
February 21, 2025
: doc: add eino english docs (#1255) (4f6a3bd)